Garlic is one of those crops that rewards patience more than skill.
You plant cloves in fall, forget about them through winter, and pull full bulbs from the ground the following summer - often from the same bed where you might grow cold-hardy greens in early spring.
Allium sativum splits into two main categories: hardneck and softneck. Which one you plant matters more than most beginners realize.
Garlic is planted in fall, overwinters in the ground, and harvests in early summer. Hardneck varieties suit cold climates and offer better flavor.
Softneck types store longer and tolerate warmer winters. Success comes down to good soil prep, correct clove depth, and knowing when to stop watering.
Hardneck vs. Softneck: Pick the Right Type First
Most grocery store garlic is softneck - it ships well and stores for up to a year. But softneck varieties lack the complex flavor of hardneck types, and they perform poorly in zones 3-6 where winters are genuinely cold.
Remember it later
Planning to try this recipe soon? Save it for a quick find later!
Here's how the two types break down in practical terms:
- Hardneck (Allium sativum var. ophioscorodon): Best for zones 3-7. Varieties like Rocambole and Purple Stripe develop rich, layered flavor. They produce scapes in spring - edible flower stalks you should remove to redirect energy into the bulb.
- Softneck (Allium sativum var. sativum): Better for zones 7-10, where winters stay mild. Artichoke and Silverskin types store longest - up to 12 months in a cool, dry spot. Cloves are smaller but more numerous per bulb.
- Elephant garlic (Allium ampeloprasum): Technically a leek relative, not true garlic. Milder flavor, very large cloves. Worth growing if you cook in bulk, but don't expect the sharpness of true hardneck varieties.
Buy seed garlic from a reputable nursery or mail-order supplier - not grocery store bulbs, which are often treated to suppress sprouting. Garden plants sourced as certified seed stock perform significantly better in their first season.
In zones 8–10, hardneck garlic needs a cold snap to vernalize properly. If winters stay above 40°F for weeks at a time, refrigerate your seed cloves for 4–6 weeks before planting to mimic dormancy.
Soil Prep: What Garlic Actually Needs Underground
Garlic roots go deep - up to 18 inches in loose soil. Compact or waterlogged ground stunts bulb development hard, so this is the one step worth spending real time on before you plant a single clove.
- Drainage first: Garlic rots in standing water. Raised beds or mounded rows fix drainage problems in clay soil without much effort.
- Soil pH 6.0-7.0: Outside this range, garlic struggles to take up sulfur - the compound responsible for its flavor. Test your soil and add lime to raise pH or sulfur to lower it.
- Compost depth: Work 3-4 inches of compost into the top 12 inches of soil. Garlic feeds heavily as bulbs form in late spring.
- Avoid fresh manure: High nitrogen at planting pushes leafy growth over bulb size. Use aged compost only, and hold off on fertilizing until early spring.
If you've been growing heavy feeders like tomatoes in the same bed, let it rest a season or rotate to a fresh spot. Garlic following tomatoes in consecutive years invites soilborne fungal issues.
A week before planting, rake in a light application of balanced granular fertilizer (10-10-10) at half the recommended rate. This gives roots something to reach toward without overstimulating top growth before winter.
How to Plant Garlic Cloves Correctly?
Timing and depth both matter here. Plant too early and cloves push excessive green growth before frost.
Plant too late and roots don't establish before the ground freezes.
In zones 5-7, aim to plant 4-6 weeks before the ground freezes - typically October through early November. Further south in zones 8-9, November to early December works better.
Knowing your first hard freeze date helps you back-calculate the right window.
Spring and Summer Care
Once shoots appear in early spring, garlic moves fast. It needs consistent moisture and a nitrogen boost to push bulb size before the days get long.
- Watering: Give garlic 1 inch of water per week from April through early June. Cut back sharply in the final 2-3 weeks before harvest - wet soil at that stage causes rot and makes curing harder.
- Feeding: Side-dress with a nitrogen-rich fertilizer (blood meal or balanced granular) in early spring when shoots reach 4-6 inches. One application is usually enough.
- Scape removal (hardneck only): Cut scapes when they curl into a full loop. Left on, they redirect energy away from bulb formation and reduce final size by 20-30%.
- Weed control: Garlic competes poorly with weeds. Hand-pull anything that breaks through the mulch layer - don't hoe close to the bed or you'll nick the shallow feeder roots.
Scapes themselves are worth keeping in the kitchen. They taste like mild garlic and work well sautéed or blended into pesto - a good reason to grow hardneck over softneck if you're on the fence.
You can use a companion planting chart to find crops that benefit from garlic's proximity while sharing the same bed space efficiently.
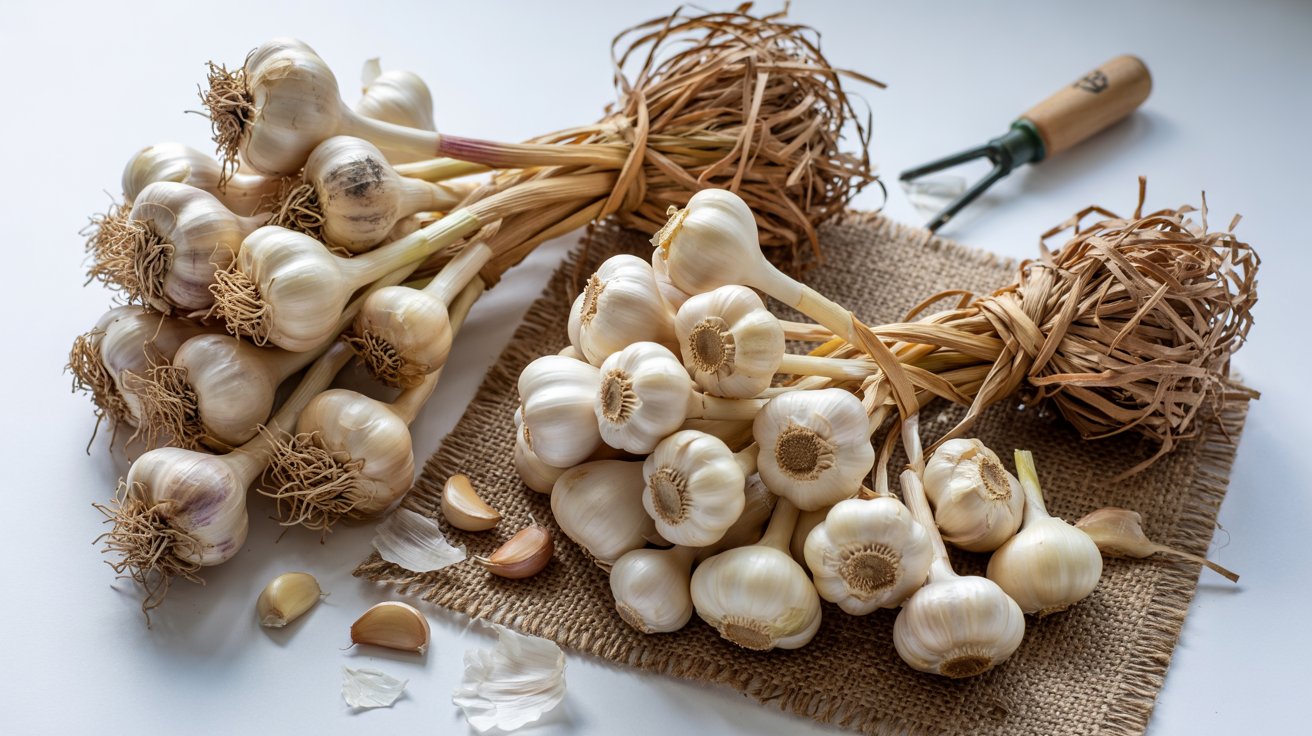
Harvesting and Curing: Don't Pull Too Early
Harvest timing is where most first-time growers go wrong. Pull too soon and wrappers are thin, cloves are small.
Wait too long and the outer skin deteriorates, cutting storage life significantly.
Watch the leaves - they're your most reliable signal. When half the leaves have turned brown and half remain green, bulbs are at peak size.
That usually lands in late June or July depending on your zone.
- Digging method: Use a garden fork rather than pulling by the stalk. Insert the fork 4-6 inches away from the plant and lever up - direct pulling snaps necks and invites mold during curing.
- Don't wash bulbs: Brush off loose dirt only. Wet bulbs sitting in humid conditions rot before they cure.
- Curing time: Hang bulbs or lay them on wire racks in a dry, well-ventilated space out of direct sun. Curing takes 3-6 weeks. Bulbs are ready when the neck is completely dry and the outer skin is papery.
If you harvest after a rain, let bulbs dry on top of the soil in sun for a few hours before moving them indoors. Storing freshly dug, damp bulbs in any enclosed space — even a ventilated shed — will cause mold within days.
Cured hardneck garlic stores for 4-6 months. Softneck stores up to a year.
Keep bulbs in a mesh bag or open crate at 50-65°F - not in the refrigerator, which triggers sprouting.
Saving Your Own Seed Garlic Year After Year
Unlike most vegetables, garlic doesn't produce seed you harvest from a pod. You replant cloves.
This makes selecting your best bulbs at harvest time the most important long-term decision you'll make as a garlic grower.
Set aside your largest, healthiest bulbs from each harvest to plant in fall. Over several generations, your saved stock adapts to your specific soil and microclimate - a process called landrace selection that commercial growers use deliberately.
- Select for size: Always replant from your biggest bulbs. Larger bulbs produce larger cloves, which produce larger bulbs - the cycle compounds over years.
- Watch for disease: Discard any bulbs with streaked or mottled skins, soft spots, or unusual coloration. These signal viral or fungal infection that will carry forward to the next planting.
- Maintain variety separation: If you grow multiple types, label bulbs clearly at harvest. Hardneck and softneck cloves look nearly identical once separated from the bulb.
After 3-4 seasons of saving and replanting your best stock, you'll notice a measurable improvement in bulb size and uniformity. The same principle applies when saving seed potatoes - selection pressure over multiple seasons pays off.
4 Mistakes That Kill Garlic Before It Bulbs
Most garlic failures trace back to a small set of repeated errors. Each one has a clear fix.
- Planting cloves upside down: The pointed tip goes up, flat base goes down. Inverted cloves still sprout, but they corkscrews underground, wasting energy and producing misshapen bulbs.
- Overwatering in late spring: Excess moisture in the final weeks before harvest causes outer wrappers to break down, exposes cloves, and dramatically shortens storage life. Stop watering when leaves begin to yellow.
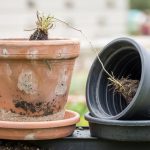
- Skipping mulch in cold zones: In zones 4-6, unmulched beds frost-heave cloves out of the soil over winter. Heaved cloves desiccate and fail. Four inches of straw prevents this entirely.
- Using supermarket garlic as seed: Commercial bulbs are often treated with growth inhibitors and may carry diseases not present in your region. Certified seed garlic costs more but eliminates this risk at the start.
Garlic is far more forgiving than crops like thin-skinned carrots in clay soil, but it won't tolerate wet feet or poorly timed harvests. Getting those two things right covers most of what can go wrong.
Never plant garlic in the same bed two years in a row. Rotating to a fresh bed every season prevents white rot and nematode buildup — both of which are nearly impossible to clear once established in garden soil.
Garlic also plays well with other crops in the broader garden. Unlike basil, which needs heat to really establish, garlic gets its critical root work done in cold weather - making it one of the few crops that genuinely improves your fall-to-spring garden rotation without competing with warm-season beds.
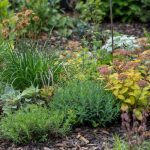
For low-maintenance companion beds, pair it with drought-adapted perennials along the border, where garlic's pest-deterrent properties are a bonus. For acid-loving shrubs nearby, note that garlic prefers neutral to slightly acidic soil - closer to the neutral end preferred by azalea root zones than most people expect.
Frequently Asked Questions
Zones 3–6 should plant in October, 4–6 weeks before hard frost. Zones 7–9 can push into November or early December, since milder winters give cloves more time to root without premature sprouting.
Plant cloves 2 inches deep in zones 7 and warmer, and 3 inches deep in zones 4–6 where frost heaving is a risk. Shallower than 2 inches and cloves push out of the soil over winter.
Fall-planted garlic matures in 240–270 days, typically reaching harvest in late June or July. Softneck varieties like Artichoke types mature slightly earlier than most hardneck Rocambole strains.
Yes, but containers need to be at least 12 inches deep and have drainage holes. Use softneck varieties like Inchelium Red, which produce smaller bulbs better suited to confined root space.
Small bulbs usually point to planting small cloves, skipping the spring nitrogen feed, or leaving scapes on hardneck plants too long — each reduces final bulb size by 15–30% on its own.
Pin it for your next how to grow garlic at home project.