Crisp lawn edges make the whole yard look intentional, even if the grass itself is just average. Most homeowners skip edging or do it inconsistently, which is why borders often look ragged by midsummer.
The good news is that a clean edge takes under an hour on most suburban lots, and the results last two to four weeks before you need to touch it again.
Learning how to edge a lawn properly comes down to three things: the right tool for your specific border type, a repeatable cutting technique, and a maintenance cadence that keeps lines sharp all season.
Utah State University Extension notes that lawn edging materials and trench depth both affect how long your edges hold between sessions.
This guide walks through tool selection, a step-by-step edging sequence, common mistakes, and seasonal upkeep - everything you need to go from rough borders to professional-looking lines.
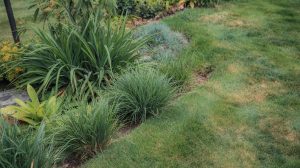
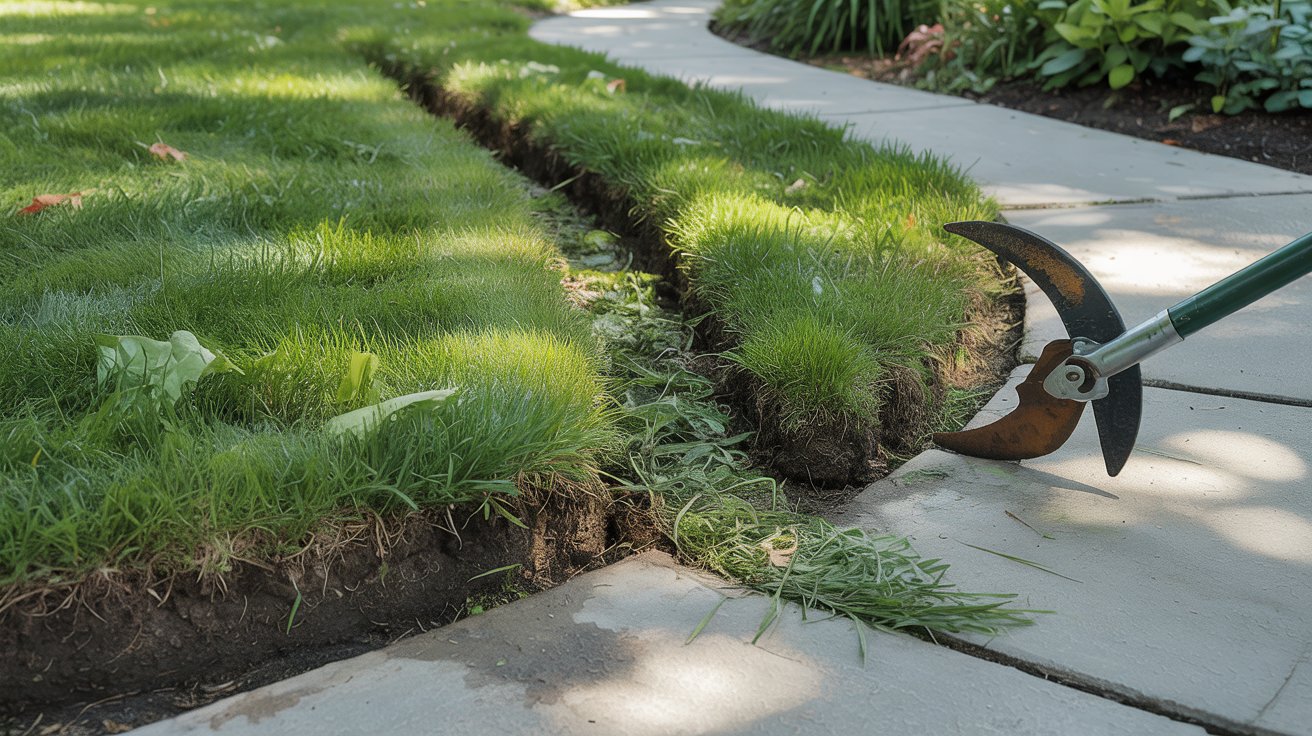
Edging a lawn means cutting a defined border between grass and adjacent beds, driveways, or walkways. Use a rotary edger for long straight runs and a half-moon spade for curves.
Most lawns need edging every 2-4 weeks during peak growing season to keep lines sharp.
Tools and Prep
Choosing the right tool before you start saves you from redoing sloppy cuts. A powered rotary edger works best along driveways and sidewalks - long, straight runs where consistency matters most.
Remember it later
Planning to try this recipe soon? Save it for a quick find later!
For curved garden beds, a half-moon edging spade gives you more control and follows the line without overcutting. Knowing your grass species and growth habit also helps you predict how fast edges will creep and how often you'll need to re-cut.
Before touching any tool, mow first. Edging on long grass makes it harder to see your true border, and mowing afterward can disturb freshly cut edges.
The Purdue lawn care guide recommends completing all mowing and trimming before edging so you're working against a flat, uniform surface. After mowing, mark your intended edge with a garden hose or string line - this gives you a visual guide to follow and prevents wandering cuts.
Here's a quick comparison of the most common edging tools to help you choose:
| Tool | Best For | Approx. Cost | Control Level |
|---|---|---|---|
| Half-moon Spade | Curved garden beds | $20–$40 | High |
| Rotary Lawn Edger (manual) | Straight flat borders | $30–$60 | Medium-High |
| Electric/Corded Edger | Long straight driveways | $50–$120 | Medium |
| Gas-powered Edger | Large lots, thick grass | $150–$350 | Medium |
| String Trimmer (edging mode) | Quick touch-ups | $40–$200 | Low-Medium |
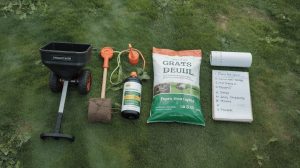
You'll also want a stiff-bristle broom, a flat-bladed spade for debris removal, and eye protection for any powered tool. Utah State University Extension recommends considering a edging and border tool with a flat blade when creating new bed edges, since a trench edge holds better than a simple surface cut.
Have a wheelbarrow or tarp nearby to collect displaced soil and clippings as you work.
Run your garden hose along the bed edge for 10 minutes before cutting. Slightly moist soil cuts cleaner and holds the trench wall better than bone-dry ground.
Step-by-Step: Edge Like a Pro
Work through this sequence in order every time. Skipping steps - especially the marking and cleanup phases - is what causes edges to drift wider or shallower with each session.
A consistent mowing and edging routine combined keeps the whole lawn looking maintained rather than just cut.
If you're edging on a slope, always cut across the slope rather than down it. Running a powered edger downhill reduces blade control and makes consistent depth nearly impossible.
When edging near buried irrigation heads or cable lines, probe the soil with a thin stake first. Most suburban lots have lines within 6 inches of the surface along beds, so the 2-3 inch depth rule isn't just about aesthetics - it's about safety.
If you're unsure where lines run, use a manual half-moon spade instead of a powered blade in those zones.
After completing the edging pass, step back and view the border from 10 feet away. This distance reveals wavering lines that are invisible at your feet.
Touch up any obvious dips or curves with a single spade cut before you pack up. Pairing clean edges with a solid year-round maintenance plan means you won't fall far behind between sessions.
In warm-season grass zones (Southeast, Southwest), grass grows aggressively from spring through fall and edges may need weekly attention in peak summer. Cool-season grass zones (Midwest, Northeast) typically need edging every 3–4 weeks during spring and fall, with less frequency in summer heat.

Common Mistakes and Fixes
Most edging problems come from a handful of repeatable errors - the kind that snowball over a season if you don't catch them early. Bob Vila's edging guide flags inconsistent blade angle as the leading cause of ragged-looking borders that widen over time.
Tilting the blade even slightly outward with each pass gradually eats into the lawn, leaving you with an ever-wider trench and a narrowing grass strip.
Scalping - cutting too close to the soil on the grass side - is another common problem. It leaves brown bare patches within 3-6 inches of the edge that take weeks to recover.
Keep the blade on the bed or hard-surface side, not angled into the turf. If your edges keep growing weeds, consider pairing your routine with the right weed control approach along borders.
- Keep the blade vertical throughout the entire pass for a clean, consistent wall.
- Work from a marked guide line so the edge doesn't wander wider with each session.
- Edge after mowing to cut against a flat, uniform turf surface.
- Remove clippings immediately - displaced grass plugs can re-root within 48 hours.
- Check depth every few feet, especially on uneven ground where blade pressure changes.
- Don't angle the blade outward - it widens the trench with every pass until turf is damaged.
- Don't edge dry, cracked soil without pre-moistening; edges crumble instead of holding a clean wall.
- Don't skip the guide line on long straight runs - even a slight drift is obvious from a distance.
- Don't cut deeper than 3 inches near beds where irrigation or cable lines may be buried.
- Don't use a string trimmer as a primary edger - it shreds rather than cuts, leaving a frayed border.
Maintenance, Bed Edging Ideas, and Seasonal Tips
Once you have a clean edge established, maintaining it is far faster than the first cut. A quick re-cut with a half-moon spade or powered edger every 2-4 weeks during the growing season keeps lines sharp without a full re-edging session.
HGTV's lawn edging ideas show how simple straight-line borders along driveways paired with curved natural beds give yards a polished, layered look without complex hardscaping.
For bed edges, choose a border material that matches your maintenance style. Straight steel or aluminum edging holds a permanent line with minimal upkeep.
Flexible plastic edging follows curves but degrades in UV over 3-5 years. Natural trench edges (no material at all) look clean when freshly cut and pair well with mulch, but need re-cutting every 3 weeks in summer.
If you're rebuilding a lawn entirely, also compare long-term maintenance costs before committing to high-edge-frequency grass varieties.
In fall, pull back edging frequency to once every 4–6 weeks as grass growth slows. In spring, do a full deep re-cut before the first mow to reset borders that shifted over winter frost cycles. Skipping the spring re-cut is the most common reason summer edges look soft.
Aerate and overseed near edges carefully - both processes can blur your border if done carelessly. Check the process for aerating near bed edges before you start, and keep plugs away from the trench walls.
Dethatching close to edges also requires care; read up on dethatching timing and depth so you don't accidentally open the trench wider than intended. Keeping edges clean through seasonal transitions makes summer garden upkeep noticeably faster.
And when you finish the season, a clean edge also gives your overseeding results a defined boundary that keeps new seed from washing into beds.

Frequently Asked Questions
A manual rotary edger is the easiest starting point — it costs $30–$60, requires no power source, and gives beginners good blade control along straight sidewalk edges.
Cut 2–3 inches deep. Shallower cuts allow grass roots to bridge back within days; deeper than 3 inches risks cutting buried irrigation or cable lines.
Yes. A clean 2–3 inch trench edge combined with 2–3 inches of mulch on the bed side significantly reduces weed germination and grass encroachment along borders.
Every 2–4 weeks for most cool-season grasses; warm-season grasses in the Southeast and Southwest may need edging weekly during peak summer growth.
Steel and aluminum edging last 20+ years with minimal maintenance. Flexible plastic edging degrades from UV exposure and typically needs replacing every 3–5 years.
Pin it for your next how to edge a lawn like a pro project.