Dull tools make every garden task harder than it needs to be. A sharp pair of pruners slices through a branch cleanly; a dull one crushes the stem and invites disease.
The same logic applies to mower blades, hoes, and shovels - a keen edge requires less force, causes less damage to plants, and protects your joints over a long season.
This guide walks through the full sharpening process, from gathering the right files and stones to finishing with a light coat of oil.
We cover three distinct tool families: pruning tools, lawn mower blades, and digging tools, because each one demands a slightly different technique and angle.
You'll also find a practical maintenance schedule that fits sharpening into your existing seasonal routine, so tools never reach the point of serious neglect.
Before picking up a file, check your glove options - metal filings and freshly sharpened edges are a bad combination for bare hands.
Gear up with the basics listed below, and the process moves quickly. Most hand tools take under ten minutes once you know the correct angle and stroke count.
Sharpening garden tools restores cutting efficiency, reduces effort, and extends tool life. This guide covers pruners, mower blades, shovels, and hoes using files, whetstones, and basic safety gear in a repeatable seasonal routine.
What You Need Before You Start?
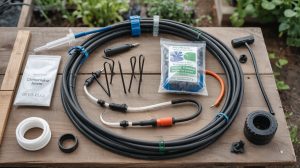
The sharpening kit for garden tools is short and inexpensive. Oregon State Extension's tool sharpening guide recommends a flat mill file, a sharpening stone, a metal vise or clamp, eye protection, and heavy work gloves as the core setup for most home gardeners.
Remember it later
Planning to try this recipe soon? Save it for a quick find later!
Beyond safety gear, you need a light machine oil - 3-in-1 or a dedicated tool oil - to protect freshly sharpened edges from rust.
A wire brush clears dirt and rust before you file, which protects the file's teeth and gives you a cleaner starting surface.
- Flat mill file (8-10 inch): The primary tool for shovels, hoes, and mower blades. Single-cut files work best for maintaining a consistent bevel.
- Diamond file or whetstone: Better suited for the fine edge on pruners and hedge shears, where you need precision at a shallow angle.
- Metal vise or bench clamp: Keeps the tool stationary so both hands stay clear of the cutting edge during filing.
- Wire brush: Removes rust, soil, and sap before sharpening so the file cuts metal, not debris.
- Eye protection and gloves: Metal filings travel. Both are non-negotiable before any filing begins.
- Light machine oil: Applied after sharpening to seal the edge and prevent oxidation between uses.
Mill files cut in one direction only — the push stroke. Dragging them back across the edge dulls the file teeth and produces an uneven bevel. Lift the file off the metal on the return stroke every time.
Reviewing your full tool care and selection resources before sharpening season helps you spot which tools need replacement rather than just sharpening - a cracked handle or bent blade warrants more than a file pass.
The Sharpening Process, Step by Step
The workflow below applies to all three tool families, with technique differences noted at each stage. Working through the steps in order prevents the most common mistakes: sharpening a dirty blade, skipping deburring, and storing tools without oil.
Illinois Extension's stepwise sharpening guidance confirms that correct angle, consistent stroke direction, and post-sharpening lubrication are the three factors that most affect edge quality and longevity.
Balance mower blades after sharpening by hanging them on a nail through the center hole. If one side dips, remove a little more metal from the heavy end. An unbalanced blade causes vibration that wears out the mower spindle bearing prematurely.
For the rest of your summer equipment care, a summer garden maintenance routine pairs well with sharpening - clean, lubricate, and inspect everything in one session rather than spreading tasks across separate days.

Tool-Specific Sharpening Tips
Each tool family has characteristics that change how you hold the file, how many strokes you use, and how sharp the final edge should actually be.
Wisconsin Extension's per-tool sharpening guide notes that matching technique to tool type prevents the two most common failures: over-grinding thin blades and under-sharpening thick digging tools.
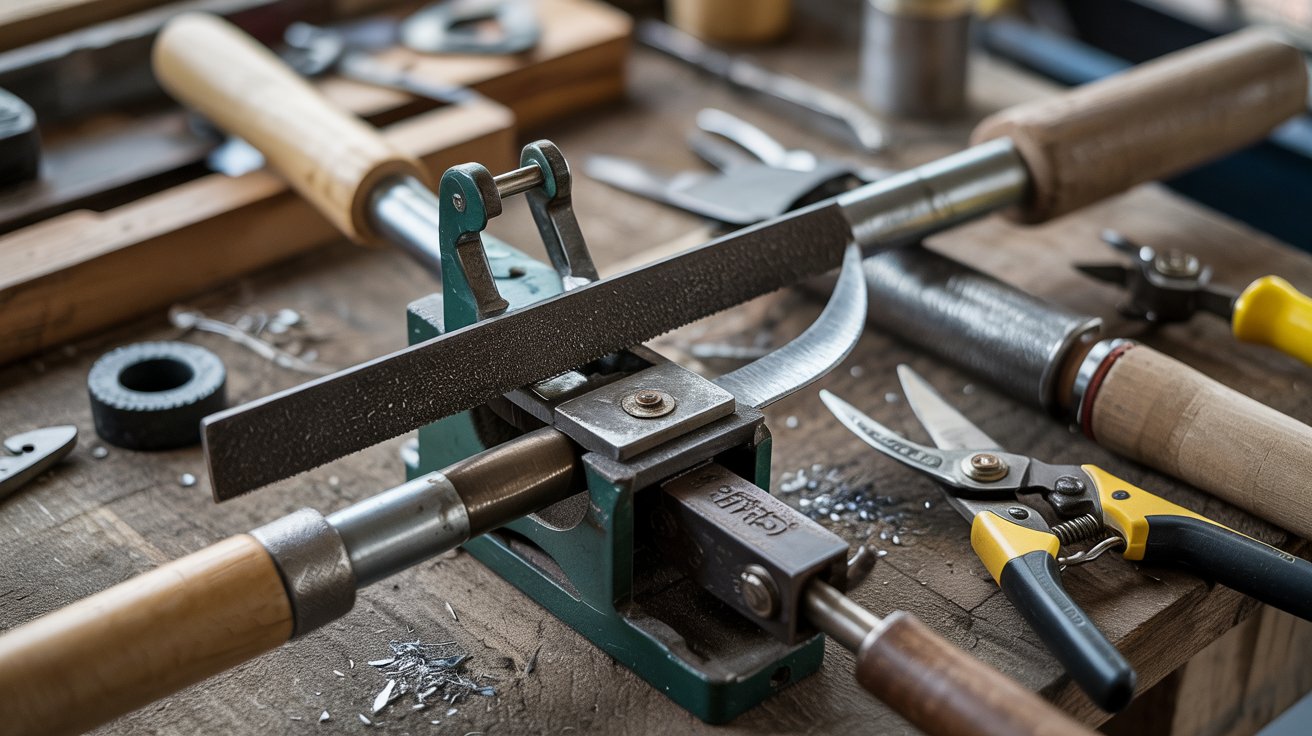
Pruners and hedge shears have a single beveled face - only the beveled side gets filed. The flat back face is never filed at an angle; that destroys the geometry that makes them cut.
Hold the blade firmly, match the existing 20-25 degree bevel, and count strokes evenly across the full length of the blade.
| Tool | Sharpening Angle | Best File/Stone | Notes |
|---|---|---|---|
| Pruners / Loppers | 20–25° | Diamond file, ceramic stone | Bevel side only; hone after filing |
| Hedge Shears | 20–25° | Flat mill file, whetstone | Check blade alignment after sharpening |
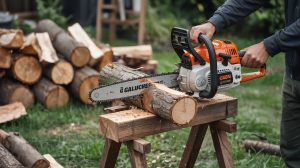
| Lawn Mower Blade | 30–45° (match original) | 10-inch mill file | Balance blade after every sharpening |
| Shovel / Spade | 30–35° | Flat mill file | Sharpen the top (soil-facing) bevel only |
| Hoe | 30° | Flat mill file | Re-establish bevel if edge is rounded |
| Axe / Hatchet | 25–30° | Bastard file, whetstone | Work both sides evenly |
Shovels and hoes take a 30-35 degree bevel on the top face - the side that faces away from the soil as you dig. If years of use have rounded the edge completely, use a bastard-cut file to re-establish a fresh 30 degree angle before switching to a mill file for refining.
This takes more strokes but is faster than fighting a smooth, rounded edge with a fine file.
Angle grinders speed up mower blade sharpening but generate enough heat to remove the blade's temper if you linger in one spot. Keep the grinder moving, dip the blade in water every 30 seconds, and stop if the metal turns blue — that color indicates overheating and lost hardness.
If you're comparing power tools for the mowing side of your yard work, the gas vs. electric mower breakdown covers blade access differences that affect how you approach removal and reinstallation.
Maintenance Schedule and Safe Storage
Sharpening once a year is better than never, but a short check-and-touch-up schedule keeps tools performing well all season without requiring a full sharpening each time.
The rule of thumb from Wisconsin Extension is simple: sharpen before heavy use begins, check midseason, and clean and oil before storage.
Post-use cleaning takes two minutes and prevents the rust and sap buildup that turns a ten-minute sharpening job into a thirty-minute restoration.
Wipe metal surfaces after every use, and use a rag with a light oil coating on blades that won't be used for more than a week.
| Timing | Task | Tools Affected |
|---|---|---|
| Early spring | Full sharpen + oil all blades | All cutting and digging tools |
| Mid-season | Quick touch-up with file or stone | Pruners, mower blade, hoe |
| After each use | Wipe clean, remove sap, spot oil | Pruners, loppers, shears |
| End of season | Clean, sharpen, coat in oil, hang or store dry | All tools |
| Any time | Check for rust — remove with steel wool + oil | Any neglected tool |
Store tools hanging or blade-up in a dry space. Blades resting on concrete floors wick moisture and rust faster.
A wall-mounted rack or pegboard keeps handles accessible and edges off the ground. For tools that share storage with watering equipment, check the rain barrel setup area for drainage - standing water near stored tools accelerates rust even on oiled blades.
Handle condition matters as much as blade condition. Sand wooden handles annually with 120-grit paper and rub in linseed oil to prevent cracking.
A cracked handle on a shovel or axe transfers less force and can split under load. If you carry tools between beds in a garden cart, wrap sharp edges with a folded piece of cardboard to protect both the blade and anyone reaching into the cart.
A well-designed irrigation setup reduces how often you drag tools through wet soil, which in turn slows the rate of rust and edge wear between sharpening sessions.

Frequently Asked Questions
Sharpen pruners and hoes at least twice per season — once in early spring and once mid-season. Mower blades benefit from sharpening every 20–25 hours of use.
Match the factory bevel, which is typically 20–25 degrees on most bypass pruners. File only the beveled face — never the flat back side.
No. Always disconnect the spark plug and remove the blade before sharpening. Filing in place makes balancing impossible and creates a serious injury risk.
A dual-grit diamond stone (around 200/400 grit) handles most garden tools well. Ceramic honing rods are better for final finishing on pruner blades.
Scrub with coarse steel wool and a few drops of machine oil. Heavy rust responds to soaking in white vinegar for 30 minutes before scrubbing, then rinse and dry immediately.
Pin it for your next how to sharpen garden tools project.