A few bare patches in an otherwise decent lawn can spread fast if you ignore them. Thin spots let weeds move in, and once crabgrass or dandelions get a foothold, the original grass struggles to recover on its own.
Knowing how to fix a patchy lawn comes down to four repeatable steps: assess the damage, prepare the soil, apply seed and mulch, then maintain consistent moisture until the grass fills in.
Patch repair works well for bare spots under roughly 200 square feet. Anything larger starts to look like a full lawn overseeding project rather than spot work.
University extension research confirms that patch repair mixes combine seed, mulch, and starter fertilizer to improve germination in bare spots - making them a faster option than raw seed alone for small repairs.
For bigger bare areas, aeration before overseeding helps new seed reach soil and compete with weeds, which is worth knowing if your patchiness covers more than a few square feet per zone.
Fixing a patchy lawn takes four steps: assess, prep soil, apply seed and mulch, then water consistently. Most bare spots show visible germination within 1–3 weeks when seed-to-soil contact is good and moisture is maintained.
Step 1: Assess, Prep, and Plan
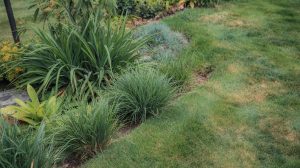
Before buying anything, spend ten minutes walking the lawn and categorizing each bare spot. A patch caused by dog urine looks different from one caused by grub damage, and treating the wrong problem means the bare area returns.
Remember it later
Planning to try this recipe soon? Save it for a quick find later!
Bare spots fall into three main categories: physical wear (foot traffic, parking), disease or pest damage, and thinning from shade or soil compaction. Each type needs a slightly different fix before seed ever touches the ground.
Sun exposure also affects seed choice. A bare patch under a tree needs a shade-tolerant variety like fine fescue, not a full-sun mix.
Putting the wrong seed in a shaded spot is one of the most common reasons patches fail to fill in.
Once you know patch size, soil condition, grass type, and timing, you can build a shopping list that matches the actual repair needed. A year-round maintenance plan helps you avoid repeat bare spots once the new grass establishes.
If the same patch goes bare repeatedly after reseeding, check for underlying grub or fungal activity before trying again. Reseeding over an active pest problem wastes both seed and time.
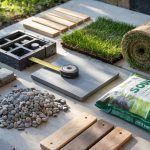
Materials, Seed, and Timing
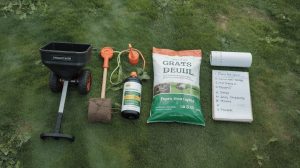
Choosing the right seed and amendment products before you start saves at least one extra trip to the garden center. The table below covers the most common seed types, recommended seeding rates, and topdressing options for bare spot repair.
Patch repair mixes from Oregon State extension research confirm that pre-blended products combining seed, mulch, and starter fertilizer consistently improve bare spot establishment compared to broadcast seed alone.
Match the product's seed species to what you already have growing - a mismatch creates color and texture variation that looks worse than the original bare patch.
| Grass Type | Seeding Rate (bare spot) | Best Timing | Recommended Topdress |
|---|---|---|---|
| Tall Fescue (cool-season) | 6–8 lbs / 1,000 sq ft | Late Aug – mid-Oct | Fine compost or straw mulch |
| Kentucky Bluegrass (cool-season) | 2–3 lbs / 1,000 sq ft | Late Aug – mid-Oct | Peat topdressing or fine compost |
| Perennial Ryegrass (cool-season) | 6–8 lbs / 1,000 sq ft | Early Sept – Oct | Straw mulch or patch mix media |
| Bermudagrass (warm-season) | 1–2 lbs hulled seed / 1,000 sq ft | Late May – July | Fine sand or compost blend |
| Zoysia (warm-season) | 1–2 lbs / 1,000 sq ft (plugs preferred) | Late spring – early summer | Sandy loam topdressing |
| Fine Fescue (shade / cool-season) | 4–5 lbs / 1,000 sq ft | Aug – Sept | Light compost, no heavy mulch |
University of Minnesota extension guidance confirms you should match seed variety to existing lawn species for uniform color and growth - a detail many pre-packaged mixes ignore by using generic fescue blends.
For warm-season lawns, drought-resilient warm-season options like buffalograss or zoysia may better suit regions with dry summers than standard Bermuda.
If you are deciding between seed and sod for a larger patch, the sod versus seed tradeoffs are worth reviewing before you commit to a method.
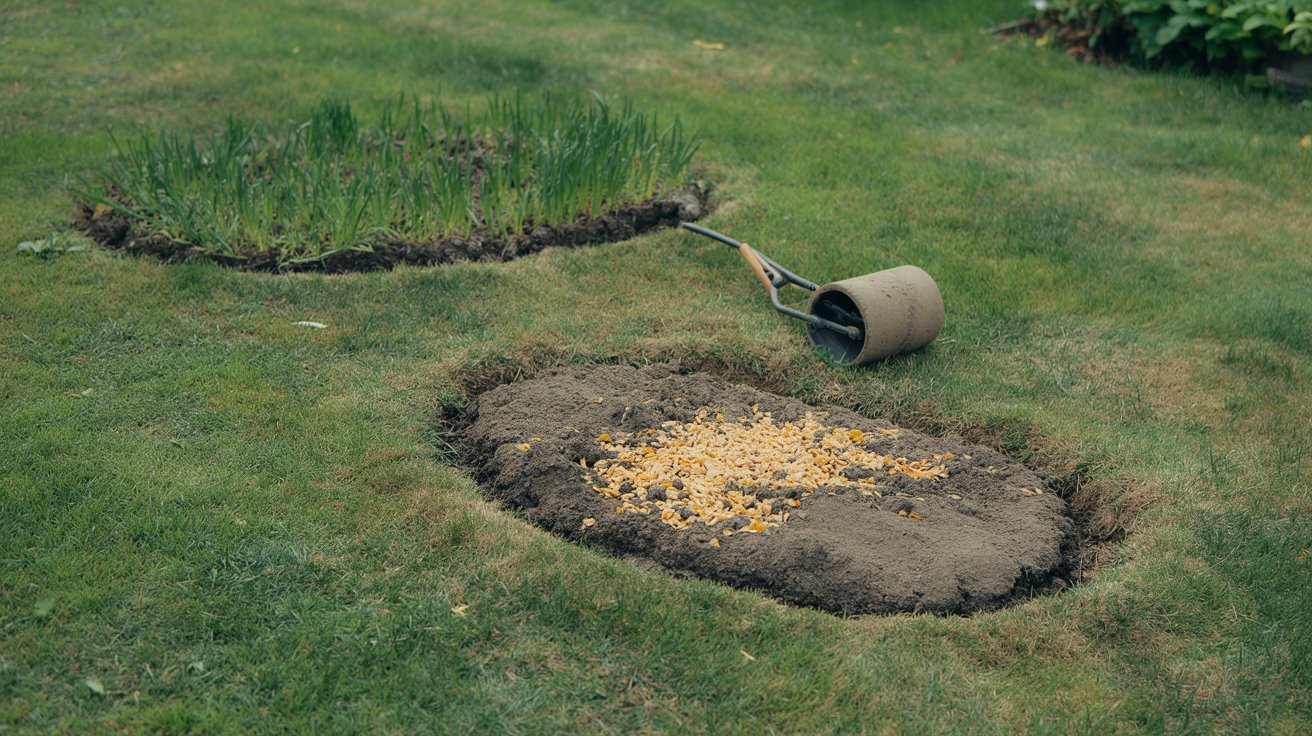
Step 3: Apply Seed and Mulch
With soil loosened and your seed selected, application technique determines whether the patch fills in or washes away after the first rain. Even coverage without clumping is the goal.
Spread seed by hand for patches under 4 square feet, or use a small handheld broadcast spreader for larger areas. University of Minnesota extension research advises gentle, even sowing to ensure coverage without clumping, followed immediately by mulch to retain moisture.
After broadcasting seed, lightly rake the surface so seed sits no deeper than ¼ inch. University of Maryland extension data confirms that pressing or lightly raking seed into the soil for good seed-to-soil contact is more important than any other single application step.
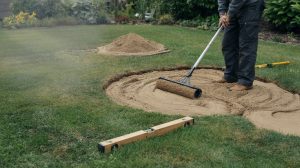
Apply a ¼-½ inch layer of straw mulch or fine compost over the seeded area. This layer keeps moisture in, moderates soil temperature, and reduces seed displacement from wind or light rain.
Tamp the patch gently with the back of a rake or a hand roller. Skip this step and seeds shift with every watering.
For slopes, lay erosion-control netting over the mulch to prevent washout until germination anchors the seedlings. Check our comparison of starter vs. maintenance fertilizers if your patch mix does not include a starter formula.
Divide your seed into two passes — one north-to-south, one east-to-west. This cross-hatch method gives more uniform coverage than a single broadcast pass, especially on patches larger than 6 square feet.
Step 4: Aftercare and Troubleshooting
New seed needs consistent moisture for 2-4 weeks - not soggy soil, but never fully dry. Water lightly twice daily (morning and late afternoon) for the first two weeks, then taper to once daily as seedlings reach ½ inch tall.
University of Minnesota extension confirms that germination typically begins within 1-3 weeks under favorable conditions, with cool-season grasses responding faster in the 50-65°F soil temperature range common in early fall.
- Mowing: Wait until new grass reaches 3-3.5 inches before the first mow. Cutting too early rips out shallow seedlings.
- Fertilizer timing: University of Maryland extension advises against heavy fertilization immediately after seeding - follow label guidance carefully and use a light starter rate only if a soil test confirms deficiency.
- Foot traffic: Keep foot traffic off repaired patches for at least 4 weeks after seeding. Even light pressure compresses the loose soil and disrupts root anchoring.
- Weed pressure: Expect some weed germination alongside grass seed. Hand-pull weeds in the first 6 weeks rather than applying herbicide, which can damage new seedlings. Review heat-season weed control if warm-season weeds emerge aggressively.
Do not apply a pre-emergent herbicide within 8–10 weeks of seeding — it blocks grass germination just as effectively as weed germination. Check product labels for re-entry intervals specific to new seedings.
If a patch still shows thin coverage after 4 weeks, check soil moisture levels and reseed the thin areas at half the original rate.
Thin coverage after 6 weeks usually signals a pH problem, persistent shade, or ongoing pest activity - revisit soil prep before adding more seed.
A consistent bare spot prevention routine - including seasonal aeration, overseeding in fall, and proper irrigation - reduces how often you need to repeat patch repairs. For large-patch installs where sod is the better option, our step-by-step on sod installation technique covers the full process.

Frequently Asked Questions
Cool-season grasses repair best from late August through mid-October when soil temps drop to 50–65°F. Warm-season grasses need soil above 65°F, making late May through July the target window.
Seed works well for patches under 200 square feet and costs far less. Sod makes sense for high-traffic or erosion-prone areas where waiting 3–4 weeks for germination isn't practical.
Most commercial patch repair mixes include a starter fertilizer pre-blended with seed and mulch. Check the label — starter fertilizer typically shows a higher middle (phosphorus) number, like 10-18-10.
Germination begins in 1–3 weeks under good conditions. Full visual fill-in typically takes 4–8 weeks depending on grass species, with Kentucky bluegrass being the slowest at up to 28 days to germinate.
No. Keep all foot traffic off repaired patches for at least 4 weeks. Pressure compacts the loose seedbed and pulls up shallow roots before they anchor, causing thin or failed germination.
Pin it for your next how to fix a patchy lawn project.