A French drain is one of the most reliable fixes for a soggy backyard, and most homeowners can complete a basic installation over a weekend with rented equipment.
The concept is simple: a sloped trench filled with gravel and a perforated pipe captures surface or subsurface water and moves it away from problem areas before it pools near your foundation, lawn, or patio.
Most DIYers underestimate two things - slope and outlet planning.
Without a consistent 1% minimum slope (roughly 1 inch of drop per 10 feet of run), water stalls in the pipe and the drain fails within a season.
Getting the outlet right is equally important, because water has to go somewhere legal and practical once it leaves your yard.
This guide walks through every step: site assessment, materials, trenching, fabric, gravel, pipe, backfill, and discharge. Expect to spend $10-$30 per linear foot for a DIY install on a standard 50-100 ft run, compared to $25-$60 per foot when hiring a contractor.
University extension research on soil drainage planning reinforces what most experienced installers already know: the soil type in your yard directly affects how aggressively you need to drain and how much gravel you'll need.
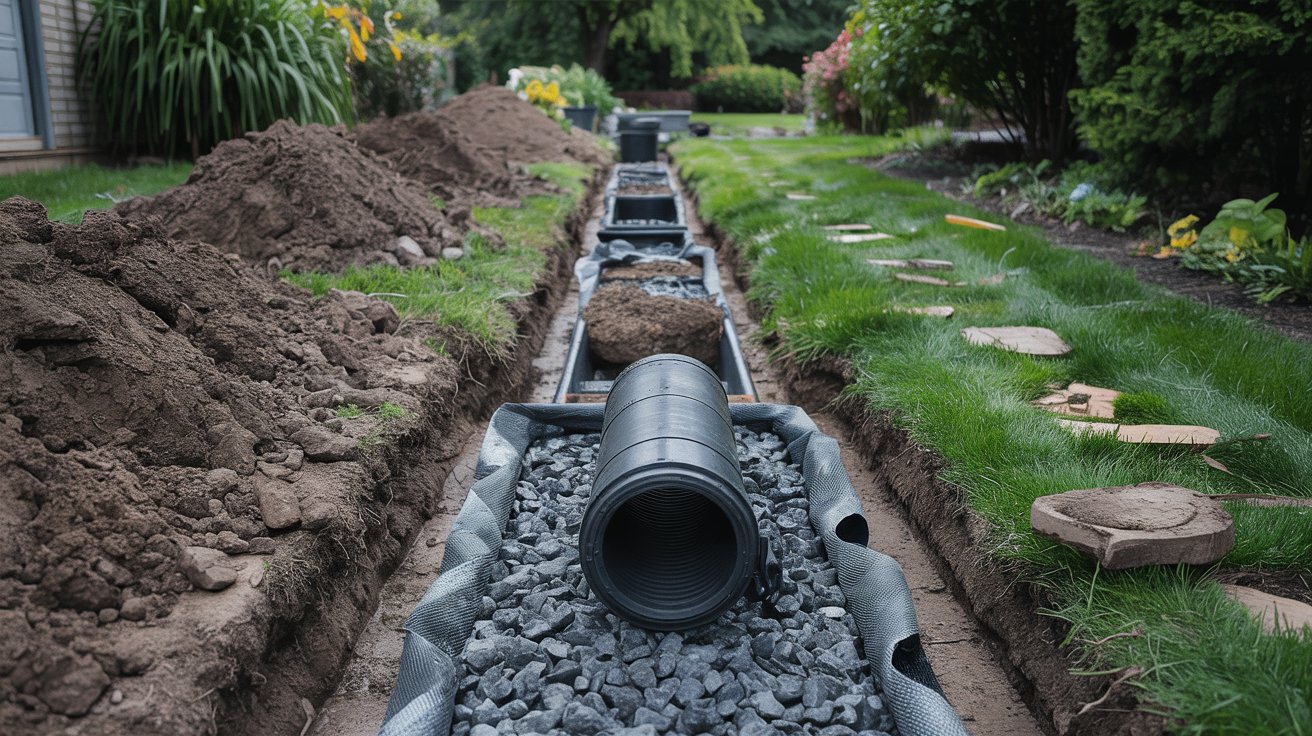
A French drain uses a sloped trench, geotextile fabric, washed gravel, and a perforated pipe to redirect groundwater away from problem areas. Most residential installs run 50–100 ft and can be completed in one to two days with basic tools.
Sketch your yard on paper before buying a single material. Mark the water source, the intended trench path, and the outlet point. A five-minute sketch prevents expensive re-digs.
Tools, Materials, and Site Prep
Getting materials right before you break ground saves trips to the hardware store mid-project. A French drain has four core layers - fabric, gravel, pipe, and backfill - and each layer has specific requirements that affect long-term performance.
Remember it later
Planning to try this recipe soon? Save it for a quick find later!
Call 811 (Dig Safe) at least three business days before digging. The free service marks buried utility lines, and skipping it is both dangerous and illegal in most states.
Essential Tools
- Trenching shovel or rented trencher: A manual trenching spade works for short runs under 30 ft; rent a walk-behind trencher for anything longer to save hours of labor.
- Tape measure and string line: Use these to confirm consistent slope before digging - measure drop every 10 ft along the planned trench path.
- Level and line level: A 4-ft level checks individual trench sections; a line level stretched between stakes confirms slope across the full run.
- Wheelbarrow: You'll move a significant volume of excavated soil and gravel - a contractor-grade 6-cu-ft wheelbarrow moves material faster.
- Pipe cutter or hacksaw: Needed to cut perforated pipe to length at corners or outlet ends.
- Tamper: A hand tamper firms the gravel bed under the pipe and prevents settling after backfill.
- Safety glasses and gloves: Gravel and pipe edges cause cuts; eye protection matters when cutting corrugated pipe.
Materials Bill for a 75 ft Run
| Material | Spec / Notes | Estimated Cost |
|---|---|---|
| Perforated pipe | 4-in. corrugated or rigid PVC, slotted | $40–$90 |
| Washed drainage gravel | #57 or pea gravel, 1–1.5 tons per 25 ft | $120–$200 |
| Geotextile filter fabric | Non-woven, 4 oz/sq yd minimum | $40–$70 |
| Fabric staples / stakes | To hold fabric in trench during fill | $8–$15 |
| Outlet grate or end cap | Day-lite emitter or pop-up emitter | $10–$25 |
| Topsoil/sod for backfill | To restore surface over covered trench | $20–$50 |
| Total estimate (75 ft) | DIY labor only | $240–$450 |
The LSU AgCenter installation guide specifies a trench 12-18 inches wide and 18-24 inches deep for standard residential applications, using non-woven geotextile fabric and washed gravel with no fines.
Gravel quality matters more than most guides admit. Washed #57 stone (roughly ¾-inch diameter) drains far faster than pea gravel because it has fewer fines clogging the void spaces.
You can compare gravel prices before ordering to stay on budget.
Minnesota extension research on site setbacks and drainage recommends keeping any drainage feature at least 10 ft from property lines and confirming local setback rules before marking your trench path.
Some municipalities also require permits for drainage work that directs water to a street or storm drain.
Clay-heavy soils drain 10-20 times slower than sandy soils, which means a drain sized for sandy conditions will underperform badly in clay.
If your yard has clay, plan for a wider gravel envelope - at least 6 inches on each side of the pipe rather than the minimum 3 inches.
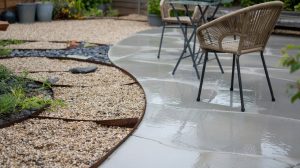
When budgeting your overall yard overhaul, consider that drainage is often the first step before projects like building a gravel patio or a hardscape surface - solving drainage first prevents those surfaces from washing out.
Step-by-Step Installation
Follow these steps in sequence. Skipping or reordering them - especially fabric placement - is the most common reason DIY French drains fail within two years.
According to MSU Extension drainage guidance, planning slope and outlet location before any digging starts is the single most important factor in long-term drain performance.
Never skip the geotextile fabric or substitute it with landscape plastic sheeting. Plastic blocks drainage entirely and causes total drain failure within one season. Only non-woven geotextile fabric allows water to pass while filtering out fine soil particles.
Once the drain is working, think about what comes next in the yard. Installing a drain often opens up space for hardscape - many homeowners use the finished trench line as a natural boundary for adding a retaining wall along sloped areas.
Curious about long-term yard project costs? Knowing what a paver walkway costs helps when planning the full backyard budget after drainage is resolved.

Design Variations and Flexibility
Not every yard drainage problem calls for the same layout. A standard linear French drain handles most surface water issues, but site conditions sometimes require adapted designs.
An exterior perimeter drain runs around the outside of a foundation at the base of the footing, intercepting groundwater before it presses against the wall.
This type requires deeper excavation - often 4-6 ft - and should tie into a sump pump system or a storm drain, not just a surface outlet.
In high-rainfall climates (Pacific Northwest, Gulf Coast, Southeast), a single 4-inch pipe may not handle peak flow. Consider a 6-inch pipe or a dual-pipe layout for runs longer than 100 ft in these regions.
An interior curtain drain intercepts subsurface water before it reaches a wet zone - useful when water migrates through a slope toward a low area. These run perpendicular to water flow rather than parallel to the problem area.
University of Minnesota extension research on drainage and rain garden design shows how combining a French drain outlet with a rain garden can handle overflow during heavy storms.
Pairing a French drain with a rain garden at the outlet point is an effective approach where lawn drainage codes restrict direct discharge to storm sewers. The garden absorbs the slow-release water the drain delivers.
MSU Extension's notes on soil and water management explain how soil permeability determines whether a rain garden or dry well outlet will work better on your property.
If your outlet options are limited, a dry well (a gravel-filled pit roughly 3 ft wide and 3 ft deep) can absorb 30–50 gallons of discharge per storm event. Size it up in clay soils where percolation is slow.
Thinking about how drainage fits into your broader yard drainage and grading plan helps avoid redoing work later. Once water is controlled, finishing touches like well-lit outdoor paths or a finished fence line - knowing current fence installation prices helps with budgeting - make the yard functional and attractive year-round.
For reference on evening project costs, lighting fixture pricing and driveway resurfacing estimates are worth checking once drainage is solved.
Frequently Asked Questions
Many municipalities require a permit when a French drain discharges to a public storm sewer or street. Check with your local building department before digging — rules vary significantly by city and county.
Most homeowners can handle a standard 50–100 ft yard drain DIY for $240–$450 in materials. Hire a pro for installs near foundations deeper than 3 ft or where waterproofing ties into a sump system.
Standard yard French drains are buried 18–24 inches deep. Foundation perimeter drains require 4–6 ft depth to reach the footing level and intercept groundwater effectively.
An exterior French drain reduces hydrostatic pressure but rarely solves active basement flooding alone. Most foundation water problems also require waterproof membrane coating and an interior sump pump system.
A 75 ft run takes one to two days for two people. Trenching accounts for roughly 60% of total labor time — renting a walk-behind trencher cuts digging time from 6 hours to under 2 hours.
Pin it for your next how to install a french drain project.