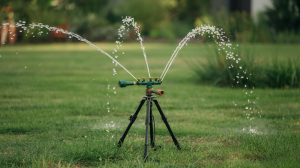
A drip irrigation kit can cut your outdoor watering time to nearly zero while using 30-50% less water than overhead sprinklers. For most home gardeners, that trade-off pays for itself within a single growing season.
The hardest part isn't installing the system - it's choosing the right kit before you buy. Garden size, water pressure, and whether you want a timer all push you toward different price tiers.
Matching kit size to your actual plot is the fastest way to avoid overspending or running short on tubing. A balcony container setup costs under $30; a full raised-bed garden with automation runs $80-$200.
University extension irrigation planning guides recommend sizing your system to peak-season demand, not average use - a detail most product listings skip entirely.
This guide maps garden dimensions to specific kit tiers, compares manual versus automated options, and gives you a clear upgrade path as your garden grows. For a broader look at drip versus overhead watering, we cover that comparison separately.
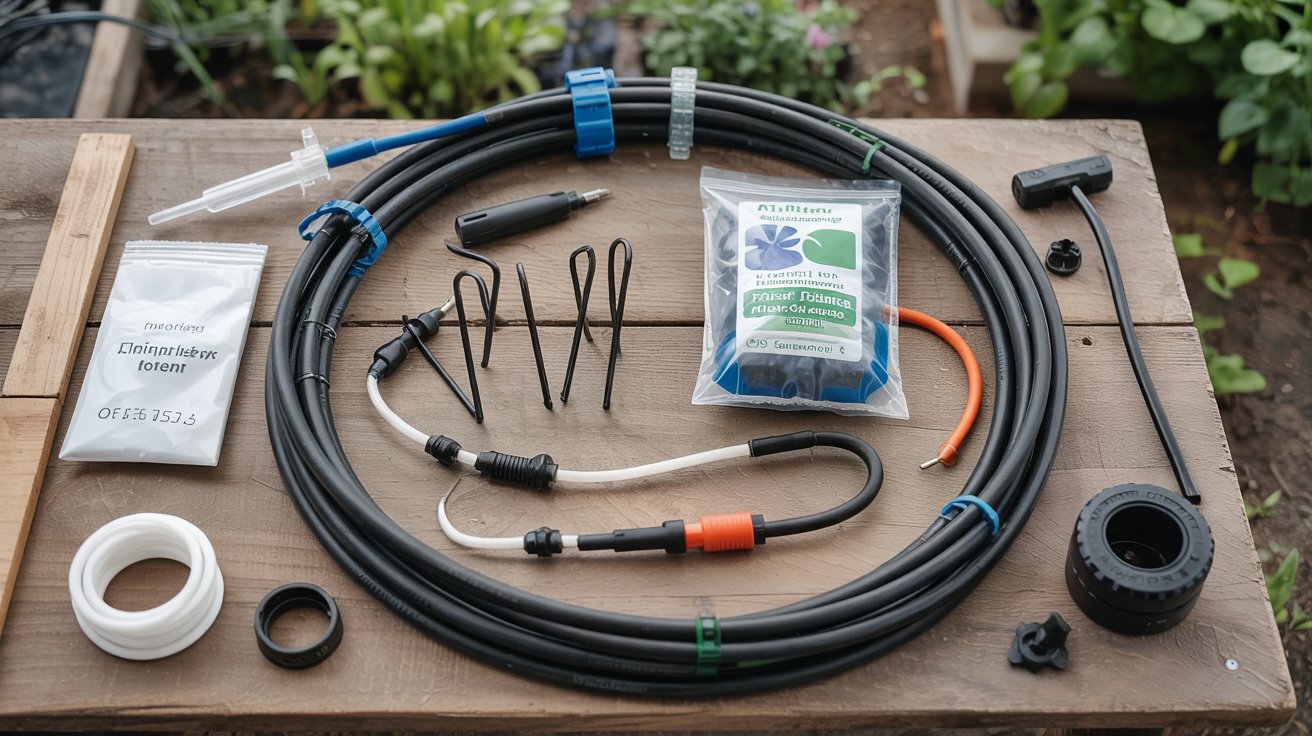
Drip irrigation kits range from basic $15–$30 starter sets for containers to $80–$200 automated systems for medium-to-large gardens. Match tubing length and emitter count to your garden footprint, then add a timer or soil sensor for hands-free watering.
Before buying, measure your garden's total row length, not just square footage. A 4×8 raised bed has 32 sq ft but may need 24–32 feet of drip tubing to reach every plant row. Tubing length is the spec that actually matters.
Garden Size and Water Needs: Picking the Right Kit
Every kit tier targets a different garden scale, and the mismatch between product marketing and real garden dimensions is where most buyers go wrong. Knowing your actual tubing requirement - not just square footage - makes the right tier obvious.
Remember it later
Planning to try this recipe soon? Save it for a quick find later!
The Oregon State drip conversion guide recommends calculating emitter spacing before purchase: most vegetables need emitters every 12-18 inches along the row, which adds up fast in a multi-bed setup.
| Garden Type | Typical Size | Tubing Needed | Emitters | Flow Rate |
|---|---|---|---|---|
| Balcony / Containers | Under 50 sq ft | 10–25 ft | 6–12 | 0.5–1 GPH each |
| Small Raised Beds | 50–200 sq ft | 25–100 ft | 12–30 | 1 GPH each |
| Medium Veggie Plot | 200–600 sq ft | 100–300 ft | 30–80 | 1–2 GPH each |
| Larger Perennial Beds | 600+ sq ft | 300 ft+ | 80–150+ | 2 GPH each |
Container and balcony setups need the fewest components - often a single header line with adjustable micro-emitters. Flow rate matters more than pressure at this scale because containers drain fast and can't buffer excess water.
Medium veggie plots are where most home gardeners underestimate tubing. A three-bed setup of 4×12 raised beds needs roughly 150-180 feet of ½-inch mainline plus drip laterals, which most entry kits don't include.
Checking a specialty crop irrigation layout can help you visualize row-by-row tubing runs before you buy.
Larger perennial beds add another variable: root zones spread wide, so you'll want 2 GPH emitters spaced 18-24 inches apart rather than the tighter spacing used for annuals. A quality garden hose with good pressure at the source keeps flow consistent across long lateral runs.
Key Features to Compare in Drip Kits
Two kit types dominate the home garden market: basic manual kits and automated kits with timers or sensor controls. The right choice depends less on budget and more on how often you're actually home to water.
According to the NRCS microirrigation factsheet, drip tape delivers water at 0.25-0.9 GPH per emitter, while micro-sprays cover wider areas at 3-10 GPH - a critical difference for dense plantings versus widely spaced perennials.
Manual kits work fine for gardeners who water on a fixed schedule and are home daily. The real drawback is missing a watering during a heat wave, which can stress transplants in hours.
Automated kits add a digital hose timer ($15-$40 as a standalone add-on) that runs the system even when you're away. Higher-end options include Bluetooth or Wi-Fi controllers that adjust schedules based on local weather forecasts.
The OSU drip conversion resource notes that automated systems consistently deliver water more uniformly than manual methods - reducing both over- and under-watering.
- Waters on schedule even when you travel or forget
- Reduces water waste by up to 50% versus hand-watering
- Expandable to multiple zones as the garden grows
- Compatible with soil moisture sensors to prevent overwatering
- Lower upfront cost — ideal for container gardens under 50 sq ft
- Simpler setup with fewer failure points
- No batteries or app required to operate
For most gardeners with a medium veggie plot, a mid-tier kit plus a $25-$35 digital timer is the sweet spot. It covers the core automation need without the complexity of a smart controller.
If you're still weighing drip against other approaches, comparing soaker hose water delivery side-by-side helps clarify which suits dense plantings better.
Setup, Maintenance, and Automation Options
Most drip kits go in within an afternoon. The process is straightforward, but a few setup decisions made early - like filter placement and emitter spacing - determine whether the system runs well for years or clogs within one season.
The OSU conversion guide specifically flags filter installation at the water source as the single most important step most DIY installers skip. Sediment and mineral particles clog 1 GPH emitters quickly without a 150-mesh or finer inline filter.
Skipping the pressure regulator on high-pressure municipal supplies (above 60 PSI) will blow fittings off and split ¼-inch tubing within days. Most home systems run at 40–80 PSI — far above the 25–30 PSI drip systems need.
Seasonal maintenance keeps emitters flowing cleanly. UMN irrigation management guidance recommends flushing the mainline at the start and end of each season by removing end caps and running water at full pressure for 30 seconds per zone.
- Flush mainlines at the start and end of each season to clear debris
- Replace clogged emitters individually rather than the whole line - they cost $0.10-$0.50 each
- Lift or store tubing before tilling raised beds to avoid punctures
- Use a pressure regulator rated for your specific kit (25 PSI for drip tape, 30 PSI for emitter lines)
- Don't bury drip tubing under mulch in the first season - wait until you've confirmed even coverage
- Don't use a single emitter flow rate for both containers and in-ground beds on the same zone
- Don't leave poly tubing exposed to UV all winter - it becomes brittle and cracks by spring
Our guide to getting full coverage from drip lines goes deeper on spacing calculations if your beds have irregular shapes. For summer upkeep across the whole yard, our summer garden maintenance checklist includes drip system checkpoints alongside other seasonal tasks.
Scalable Kits and Future-Proofing Your System
Buying a modular kit from the start is far cheaper than replacing a closed system when your garden doubles in size. The NRCS small-scale irrigation factsheet specifically highlights modular micro-irrigation as the most cost-effective path for expanding home systems.
Most quality kits use standard ½-inch mainline and ¼-inch lateral barbs, which means any brand's extension tubing fits. Avoid proprietary connector systems - they lock you into one brand's pricing for every future add-on.
- Buy kits that use ½-inch mainline - it's the universal standard for home drip systems
- Add a multi-zone manifold ($15-$35) when you need to run more than one bed from a single spigot
- Choose a timer with multiple programs so you can water raised beds and containers on different schedules
- Don't buy proprietary connector kits - expansion parts cost 3-4x more than standard fittings
- Don't overload a single zone with too many emitters - pressure drops sharply past 20-25 emitters per line
- Don't skip a second spigot adapter if your garden wraps around two sides of a house
Automation upgrades follow a clear ladder. Start with a basic mechanical timer, move to a digital multi-program unit, then add a smart Wi-Fi controller only when you have multiple zones to manage.
Smart controllers with weather-based scheduling, like Rachio or Orbit B-hyve, start at about $80 and can reduce annual water use by an additional 20-30% versus fixed-schedule timers.
If you're also capturing rainwater to supplement your supply, pairing your drip system with a rain barrel for garden watering can offset municipal water use significantly during dry spells.
The UMN extension's long-term irrigation upgrade guidance notes that systems designed for future zone additions cost roughly 15% more upfront but avoid full replacement costs later.
In freeze-prone climates (Zones 3–6), drain and store all poly tubing before the first hard frost. UV-degraded tubing left outside below 20°F develops micro-cracks that aren't visible until the following spring when you pressurize the system.
For other garden tool investments that grow with your setup, our guides on homeowner chainsaw selection, keeping garden tools sharp, and durable garden glove options cover the rest of your core kit.
A well-rounded water-saving irrigation setup pairs best with tools that are maintained and ready each season.
Frequently Asked Questions
Basic container kits start at $15–$35. Mid-range kits for raised beds run $40–$100, and full automated systems with timers cost $80–$200 or more.
Yes. A digital hose timer ($25–$40) attaches between your spigot and the kit header. Smart Wi-Fi controllers with weather-based scheduling start around $80.
Drip tape delivers 0.25–0.9 GPH directly to roots with minimal evaporation. Micro-sprinklers broadcast 3–10 GPH over wider areas, better suited for ground covers or densely spaced plants.
Most residential spigots support 20–25 emitters at 1 GPH per zone before pressure drops noticeably. Add a multi-zone manifold to split larger gardens into separate circuits.
Flush mainlines twice per season, replace clogged emitters individually, and clean the inline filter every 4–6 weeks during active growing periods to maintain consistent flow.
Pin it for your next best drip irrigation kit for home gardens project.