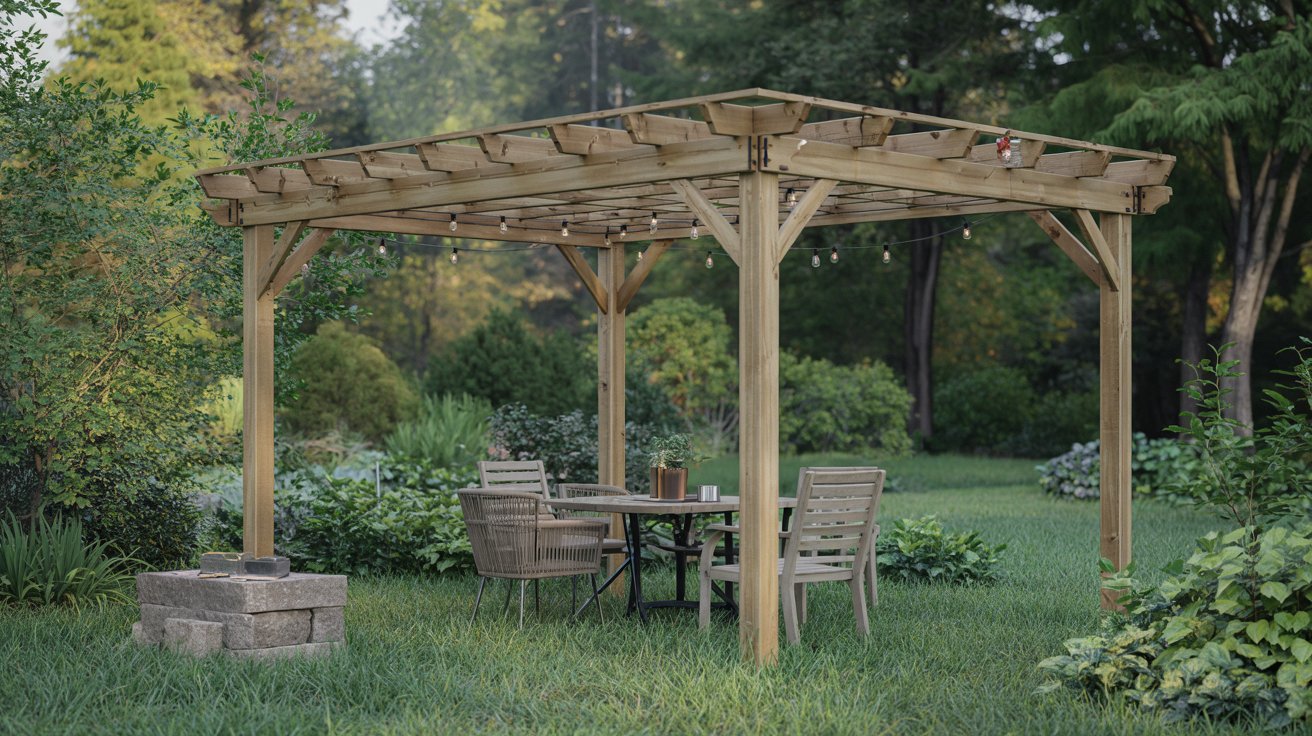
A pergola turns an ordinary backyard into a defined outdoor room, and the whole build can realistically happen in a single weekend if you plan it right.
Most DIY pergolas take two full days of work - one for footings and posts, one for beams, rafters, and finishing touches.
The biggest decision you face before buying a single board is whether to build freestanding or attached. Each setup has different footing requirements, permit implications, and space needs.
This guide walks through materials, tools, the full build sequence, sizing options, and a two-day time-block template. Before you start, know that garden structure permits may be required depending on your city - check local codes before breaking ground.
If you're also weighing other backyard structure options, knowing the pergola build process helps you compare projects accurately.
A freestanding pergola can be built in one weekend using pressure-treated lumber, concrete footings, and basic hardware. Costs run $500–$3,000 for materials depending on size and wood choice.
A permit may be required before you start.
Materials and Tools You Need
Choosing the right lumber upfront saves a trip back to the hardware store. Garden structures like pergolas rely on sturdy posts - cedar, redwood, and pressure-treated (PT) lumber are the most common choices.
Remember it later
Planning to try this recipe soon? Save it for a quick find later!
Cedar and redwood resist rot naturally; PT lumber costs less but requires more finish work.
A typical 10×12-foot pergola uses four 4×4 or 6×6 posts, two doubled 2×8 beams, and six to eight 2×6 rafters. Hardware connectors - post bases, joist hangers, and structural screws - hold everything together without relying on end-grain nailing alone.
| Item | Typical Spec | Approx. Cost |
|---|---|---|
| Posts (4) | 6×6, 8 ft cedar or PT | $80–$200 |
| Beams (2) | 2×8 × 12 ft (doubled) | $60–$120 |
| Rafters (6–8) | 2×6 × 12 ft | $80–$140 |
| Concrete | 60-lb bags, 2–3 per post | $20–$40 |
| Post bases / hardware | Simpson or equivalent | $60–$120 |
| Stain or sealant | Exterior-grade | $30–$60 |
You'll need a circular saw, drill, speed square, level, post-hole digger, and a helper - some cuts and lifts are genuinely a two-person job.
The Pergola Planner tool from Simpson Strong-Tie generates a materials list and quantity takeoff, which speeds up your shopping list before the weekend starts.
Buy 10% extra lumber to account for cuts and any warped boards. Warped posts make plumb alignment nearly impossible, so inspect each board at the yard before loading.
Steps to Build It
Follow this sequence exactly - skipping ahead causes rework. Footings must cure before you load any weight on posts, so start them first thing Saturday morning.
Before any digging, confirm your local building codes and setbacks - large garden structures can require a permit and must sit a minimum distance from property lines.
Never set posts directly in concrete without a post base — direct burial accelerates rot even on PT lumber. Post bases keep the wood above moisture and add hurricane-rated uplift resistance.
Use the full pergola cost breakdown to cross-check your material budget against real project numbers before you commit to lumber dimensions.
Freestanding vs Attached: Which Should You Choose?
The choice between freestanding and attached shapes every other decision - footing depth, post count, hardware type, and how closely you need to coordinate with your home's structure.
MSU Extension landscape design guidance notes that local codes and permits can vary by jurisdiction, especially when a structure attaches to an existing building.
A freestanding pergola stands on four or more posts with independent footings. An attached pergola replaces two of those posts with a ledger board bolted directly to a house wall or existing deck rim.
- Place it over a lawn, gravel patio, or away from the house entirely — no wall alignment needed.
- Easier to relocate or sell with the property as a standalone feature.
- No risk of water infiltration where structure meets house siding.
- Fewer posts means less digging and less concrete on Day 1.
- Creates a seamless indoor-outdoor flow from a back door or sliding glass door.
- Ledger attachment can be stronger than independent post connections if properly flashed and bolted.
If you choose attached, use a 2×10 or 2×12 ledger board and flash it with metal flashing behind the siding. A poorly flashed ledger is the leading cause of rot damage in attached structures. Check whether your jurisdiction requires a structural engineer to sign off on the ledger connection.
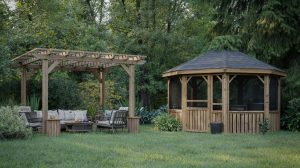
If you're still deciding how the pergola fits your overall space, comparing a pergola against a gazebo can sharpen the decision. You might also want to consider adding a backyard fire pit nearby as a complementary weekend project.
Layout, Sizing, and Finishes
Getting the proportions right is what separates a pergola that looks intentional from one that looks thrown together. The minimum comfortable dining size is 10×10 feet; 12×16 fits a full outdoor sectional.
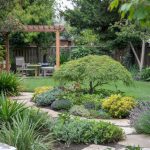
Texas State University's pergola garden demonstrates how a compact layout anchored in a yard corner creates strong visual structure without overwhelming the space.
Post spacing drives everything else. Keep beam spans under 12 feet without a center post for standard 2× lumber; go to LVL or steel for longer spans.
| Footprint | Posts | Beam Span | Best Use |
|---|---|---|---|
| 8×8 ft | 4 | 8 ft | Small seating nook |
| 10×12 ft | 4 | 10 ft | Dining table for 4–6 |
| 12×16 ft | 6 | 12 ft | Large sectional or spa |
| 14×20 ft | 6–8 | 10 ft (with mid-post) | Outdoor kitchen or entertaining |
For finishes, solid-color stain hides PT lumber's greenish tint and lasts longer than paint on horizontal surfaces. Semi-transparent stain works best on cedar or redwood to preserve the natural grain.
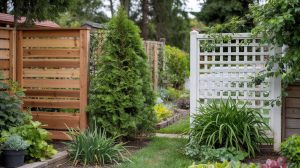
- Lattice panels: Add 2×2 lattice between posts for privacy and a structure for climbing vines like wisteria or climbing roses.
- Polycarbonate roofing: Clear or tinted polycarbonate panels over rafters block rain while keeping natural light - adds roughly $150-$400 to material cost.
- String lights: Staple hooks along the rafters before the finish coat dries, so you're not drilling into sealed wood later.
Keep rafter overhang at 12–18 inches past the beam on each side — this proportional tail gives the structure a finished, intentional look without requiring any extra lumber.
If you're working out the full budget for your backyard, use the outdoor project estimator to model different sizes and material combinations side by side.
For a lower-cost ground treatment below the pergola, a gravel patio base pairs well and drains better than poured concrete in most climates.

Two-Day Weekend Template
This time-block plan assumes two adults, all materials pre-purchased, and footings that cure fast enough to set posts by afternoon. Run the Pergola Planner before the weekend to finalize your cut list so Saturday morning starts with tools, not decisions.
In northern zones where frost lines exceed 36 inches, footings may need an extra 6–12 hours to cure adequately in cold soil. Adjust Day 1 timing accordingly — start by 7 a.m. and pour concrete before 9 a.m. to maximize cure time before post-setting in the afternoon.
| Time Block | Day 1 (Saturday) | Day 2 (Sunday) |
|---|---|---|
| 7–9 a.m. | Mark layout, call 811 | Check post plumb, remove braces |
| 9 a.m.–12 p.m. | Dig holes, pour concrete | Install beams, add post caps |
| 12–1 p.m. | Lunch — let concrete cure | Lunch break |
| 1–4 p.m. | Set posts, add bracing | Install rafters and purlins |
| 4–6 p.m. | Confirm plumb, prep lumber | Sand, stain, hang lights |
Growing vines like Virginia creeper or space-saving climbers up the posts fills gaps in shade and adds living texture within a single season. You can also add a raised garden bed along one side to anchor the pergola visually in the landscape.
For a full comparison of surface options to lay beneath the structure, the patio vs deck breakdown covers drainage and cost differences clearly. If the pergola sits near a slope, reading through retaining wall basics first helps you account for grade changes in your post layout.
Frequently Asked Questions
Most DIY pergolas take two full days with two adults. Footings need at least 4 hours of cure time, which sets the pacing for the entire build.
Pergolas are essentially longer arbors designed to cover a seating or dining area. Arbors are typically narrower gateway structures, often used as garden entry points.
Yes — use surface-mount post bases rated for concrete anchoring. Drill into the slab with a hammer drill, set anchor bolts, and attach post bases before setting posts.
Many jurisdictions require a permit for permanent structures, including pergolas. Setback rules, height limits, and attachment to a house all affect permit requirements — check with your city before starting.
Cedar and redwood need resealing every 2–3 years; pressure-treated lumber needs it every 1–2 years. Check all hardware connections annually and tighten any loose fasteners before winter.
Pin it for your next how to build a pergola (weekend project) project.