A dark backyard is a missed opportunity, and fixing it doesn't require a contractor or a week of work. well-lit outdoor spaces start with a written zone plan, a transformer plugged into a standard outlet, and two focused days of work.

This guide walks you through every step - from mapping your first zone to burying cable and aiming fixtures - so you finish the weekend with a system that actually works.
Low-voltage landscape lighting runs off a 120V outlet via a transformer and can be installed in a weekend. Map your zones first, choose wired or solar per zone, bury cable at least 6 inches deep, and test at night before backfilling permanently.
Before you buy a single fixture, gather your tools. You'll need wire strippers, a spade or trenching tool, a rubber mallet, a measuring tape, and a low-voltage transformer rated for your total fixture wattage.
According to Iowa State Extension, low-voltage systems operate off a 120-volt outlet and a power pack, making them safe for DIY work without an electrician.
Buy a transformer with at least 25% headroom above your total fixture wattage. A 150W transformer running 110W of fixtures leaves room to add a zone later without buying new hardware.
The DOE lighting design guidance stresses placement, glare control, and efficiency as the three anchors of any outdoor lighting plan - all of which you resolve on paper before Saturday morning.
Plan the Zones and Lighting Placement
A zone-based plan prevents the most common outdoor lighting mistake: too many fixtures on one run, causing dim lights at the far end. Iowa State's lighting guide recommends identifying areas to illuminate and choosing one or two focal points per zone before any digging starts.
Remember it later
Planning to try this recipe soon? Save it for a quick find later!
Translate that to your sketch by circling each zone and writing its purpose - path safety, security, ambiance, or feature highlight.
Fixture choice follows zone purpose directly. Path lights typically sit 6-8 feet apart for even coverage without harsh pools of light.
Uplights aimed at trees or a pergola column work best at 45-degree angles from the base. Downlights mounted on eaves or a finished pergola structure cast soft ambient light without glare in your eyes.
The Rutgers landscape lighting program notes that wired LED systems outperform solar on reliability and color consistency, while solar suits supplemental or accent zones well.
Factor your total lighting budget when deciding how many wired zones to start with - you can always add solar accents later.
Color temperature matters more than most beginners expect. 2700K-3000K (warm white) suits residential paths and garden beds; cooler 4000K+ readings feel clinical outdoors and often clash with warm architectural materials.
Most low-voltage transformers support multiple zones on separate terminals. Label each terminal on your transformer to match your zone map — it makes troubleshooting and future expansion much faster.
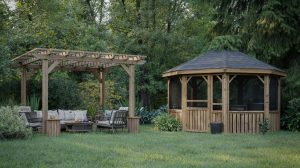
If your backyard includes a patio, hardscape, or water feature, align lighting zones with those structures. Check how full backyard layouts integrate lighting with planting beds and hardscape for a cohesive plan rather than bolt-on fixtures.
Wiring Layout: Wired vs Solar and Burial Depth
Once your zone map is final, the physical work splits into two paths. Wired low-voltage runs 12V cable from a transformer to each fixture cluster.
Solar-powered fixtures operate independently, needing only a sunny mounting position and occasional panel cleaning. According to the DOE solar lighting overview, solar landscape fixtures work best where utility power is hard to reach and where reliable direct sun is available year-round.
For wired zones, bury cable at least 6 inches deep to protect it from foot traffic and garden tools. Low-voltage cable doesn't legally require conduit at that depth, but running it through flexible conduit near high-traffic zones adds long-term protection.
Use 12-gauge wire for runs longer than 100 feet to minimize voltage drop - thinner 16-gauge wire loses more voltage over distance, leaving far fixtures noticeably dimmer.
Voltage drop is the most overlooked variable in DIY outdoor lighting. The landscape lighting best practices guide recommends keeping total cable run voltage loss under 0.5V per zone.
Test with a multimeter at the far fixture before backfilling - you want to read between 10.8V and 12V at the fixture terminal.
Never daisy-chain more fixtures than your transformer zone is rated for. Overloaded terminals overheat, trip breakers, and can damage the transformer permanently. Check the rated wattage per terminal, not just the total transformer capacity.
Solar zones need less digging but more placement thought. Mount solar panels where they face south or southwest and avoid shade from trees or roof overhangs.
For a curated list of tested products, top-rated solar path lights break down lumen output and panel efficiency by brand.
- Use 12-gauge cable for runs over 100 feet to maintain consistent voltage at far fixtures.
- Leave 12-inch cable loops at each fixture location so you can reposition without splicing.
- Test voltage at the farthest fixture with a multimeter before backfilling the trench.
- Run cable inside flexible conduit where it crosses high-traffic hardscape areas.
- Don't use 16-gauge wire on runs longer than 100 feet - voltage drop will dim your farthest fixtures.
- Don't skip the 811 utility locate call before any trenching, even shallow 6-inch cuts.
- Don't connect solar fixtures under partial shade - panels need 6+ hours of direct sun to fully charge.
- Don't overtighten snap-on cable connectors; cracked connectors corrode and lose contact within a season.
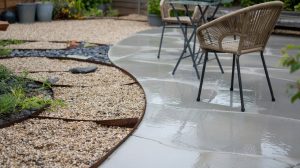
If your install includes a patio slab or paver path, plan cable crossings before laying stone. Understanding what paver work costs upfront helps you decide whether to cut channels now or route cable beneath the edge before pavers are set.

Install Fixtures and Test the System
With cable in place and transformer wired, fixture mounting takes less than an hour for most setups. Work zone by zone rather than fixture by fixture - complete all connections in one zone, do a partial power-on, then move to the next.
This catches wiring errors early without disturbing finished work.
Beam angle sets the mood more than wattage does. The DOE placement guidance notes that narrow beams (12-25°) create drama on focal trees, while wide floods (60°+) suit path safety.
Aim uplights so the beam edge doesn't spill onto neighboring property or into eye level.
For solar zones, the DOE solar operation notes recommend a full 24-hour charge before the first night test.
Check color consistency across zones - mixing 2700K wired fixtures with 5000K solar units creates a jarring visual break that's easy to miss in a showroom but obvious outdoors.
Use the AOLP placement guidelines to cross-check your beam angles. Shield any fixture that creates a visible bright spot (hot spot) in your eye line when viewed from a seated patio position.
Maintain, Troubleshoot, and Scale the System
A low-voltage system installed cleanly needs only light seasonal attention. Twice a year - spring and fall - walk each zone and check for shifted fixtures, cracked lens covers, corroded connectors, and overgrown plants blocking beam paths.
Most LED landscape bulbs last 25,000-50,000 hours, so bulb replacement is rarely urgent, but connector corrosion is the leading cause of premature fixture failure.
Scaling the system later is straightforward if you bought a transformer with spare terminals. Adding a zone means running new cable to an open terminal and assigning it in the timer or smart controller - no rework of existing runs.
The DOE controls guidance highlights smart timers and photocell sensors as the most cost-effective upgrade for energy savings after initial install.
If you plan to add a hot tub, outdoor kitchen, or other high-voltage features later, budget the full project scope now. Reviewing estimate your backyard costs before expanding helps you avoid over-installing low-voltage runs in areas that will be excavated for utility work.
In Zones 3–5, freeze-thaw cycles heave stakes each spring. Check every path fixture after the last frost and re-seat any tilted stakes before re-aiming. Coastal zones should use marine-grade connectors to resist salt-air corrosion.
The AOLP serviceability guidelines recommend keeping a simple diagram of buried cable routes. Store it with your transformer manual - it saves hours of detective work if you ever need to add irrigation or revisit full landscape project pricing down the road.
Once lighting is dialed in, the rest of your zone-based backyard plan snaps into place - outdoor seating, planting beds, and hardscape all read better when anchored by deliberate light.
A hot tub installation or fire feature becomes far more dramatic with proper uplighting already in position around it.

Frequently Asked Questions
Wired systems use a 12V transformer and deliver consistent brightness year-round. Solar fixtures need 6+ daily sun hours and perform poorly in winter or shaded yards.
Path lights work well at 100–200 lumens each. Uplights on trees or architectural features typically need 200–400 lumens for visible impact from a distance.
Yes. Low-voltage systems plug into a standard 120V outdoor outlet via a transformer — no licensed electrician required in most U.S. jurisdictions.
Two seasonal checks — spring and fall — cover most needs: inspect connectors for corrosion, re-seat heaved stakes, and clear plant growth from fixture lenses.
Replace your basic transformer timer with a Wi-Fi-enabled smart transformer. Most support app scheduling, motion triggers, and voice assistant control without rewiring fixtures.
Pin it for your next how to install landscape lighting project.