Starting seeds indoors gives you a 6-to-8 week head start on the growing season, which matters enormously if you garden in a short-season climate. You control the timing, the variety selection, and the conditions - advantages no nursery transplant can offer.
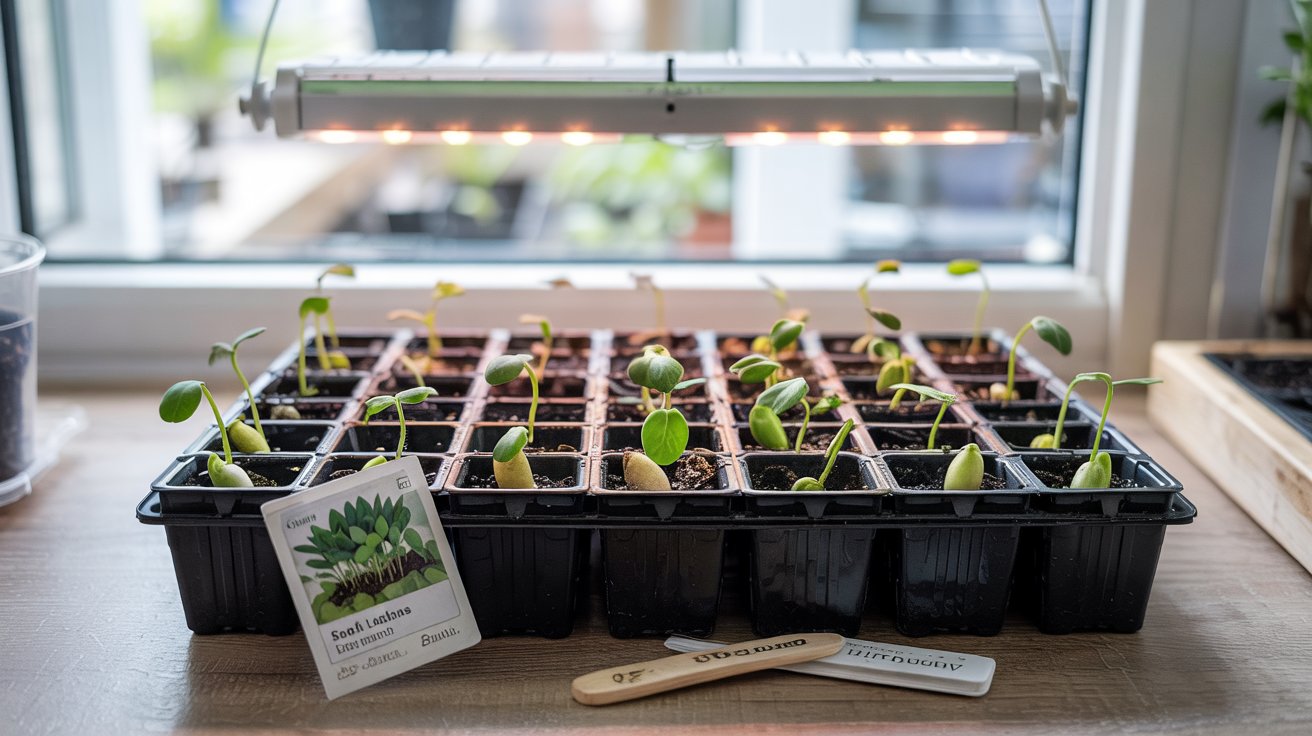
Starting seeds indoors requires seed starting mix, containers, bottom heat, and adequate light. Timing is based on your last frost date.
Most common mistakes — damping-off, leggy seedlings, wrong soil — are fully preventable with the right setup.
What You Need Before You Fill a Single Cell?
The right materials make or break germination. Regular potting soil is too dense and often harbors pathogens - seed starting mix is formulated to stay light and drain fast while holding just enough moisture for germination.
Remember it later
Planning to try this recipe soon? Save it for a quick find later!
- Seed starting mix: Look for a fine-textured, soilless blend - peat or coco coir with perlite. Avoid anything labeled "garden soil."
- Containers: Cell trays (72- or 128-cell), small pots, or recycled yogurt cups with drainage holes punched in the bottom.
- Waterproof tray: Sits under containers for bottom watering - the method that keeps foliage dry and reduces fungal risk.
- Heat mat: Keeps the root zone at 70-75°F, which dramatically speeds germination for peppers, tomatoes, and eggplant.
- Grow lights: A basic LED full spectrum fixture on an adjustable chain. Natural light from a south window works for some crops but rarely delivers enough intensity.
- Labels and a marker: Waterproof only - regular pen fades within two weeks in humid conditions.
- Spray bottle: For surface-watering tiny seeds before they germinate.
For gardeners new to indoor growing, which herbs suit beginners is worth knowing before you buy seeds - herbs like basil and parsley are low-risk first crops that build confidence fast.
Timing Your Start Date Around Last Frost
Every indoor seed-starting schedule works backward from your last frost date. Start too early and seedlings get root-bound and leggy before transplant day.
Start too late and you've lost the advantage entirely.
| Crop | Weeks Before Last Frost | Notes |
|---|---|---|
| Peppers | 10-12 weeks | Slowest to germinate |
| Tomatoes | 6-8 weeks | Pot up once before transplant |
| Eggplant | 8-10 weeks | Needs consistent heat mat |
| Basil | 4-6 weeks | Sensitive to cold soil |
| Zinnias | 4-6 weeks | Direct sow is also fine |
| Lettuce | 4-6 weeks | Tolerates light frost |
If you're planning crops for the earliest part of the year, the January planting guide gives zone-by-zone timing for crops you can start as early as midwinter.
In zones 3-5, last frost falls between late April and late May. In zones 7-9, it's February through late March. Use your county extension service's frost date map rather than guessing — being off by two weeks changes your entire schedule.
The Step-by-Step Process
Follow these steps in order. Skipping the prep stages - especially pre-moistening the mix - causes uneven germination and makes the first week harder than it needs to be.
Label every tray immediately after sowing, not after germination. Multiple trays of green seedlings look identical at two weeks old, and variety mix-ups at transplanting are nearly impossible to fix.
Seed Viability: What to Test Before You Sow
Old seeds don't always fail - but their germination rate drops every year after the packet date. Testing seed viability before you commit 72 cells to a single variety saves time and frustration.
The damp paper towel test takes ten seeds and four days. Wet a paper towel, lay seeds evenly across one half, fold it over, and seal it in a plastic bag at room temperature.
Count how many sprout after 4-7 days.
- 8-10 seeds sprout: Full viability - sow at normal spacing, one seed per cell.
- 5-7 seeds sprout: Acceptable viability - sow two seeds per cell and thin to one.
- Fewer than 5 sprout: Poor viability - buy fresh seed before investing time in a full tray.
Crops like direct-sown lettuce varieties tolerate lower germination rates outdoors because you're broadcasting many seeds, but indoors every cell counts.
Onion and parsnip seeds lose viability fast — treat any packet older than one year as suspect. Tomato, pepper, and squash seeds often stay viable for 4-5 years when stored in a cool, dry location.
4 Mistakes That Kill Seedlings Before They Get Going
Most indoor seed starting failures come down to a short list of repeatable errors. Knowing them ahead of time is the difference between a full transplant tray and a tray of collapsed seedlings.
- Using potting mix instead of seed starting mix: Regular potting soil is too coarse and compacts when wet, starving roots of oxygen. Seed starting mix stays open and drains correctly in small cells.
- Overwatering from the top: Wet foliage and saturated soil surfaces trigger damping-off - a fungal condition where seedlings suddenly collapse at the stem base. Switch to bottom watering and improve air circulation immediately if you see it.
- Insufficient light causing leggy growth: A south-facing window rarely delivers more than 4-6 hours of usable light in winter. Seedlings stretch toward the source and grow weak, pale stems. Choosing the right grow lights for your setup solves this without relying on natural light at all.
- Starting too many weeks early: Tomatoes started 12 weeks out become root-bound and stressed before soil warms enough for transplanting. Stick to the timing table and resist the urge to start sooner.
Which Crops Are Actually Worth Starting Indoors?
Not every vegetable or flower benefits from an indoor head start. Some crops resent transplanting so strongly that direct sowing outdoors gives better results - and others are so fast-growing that starting indoors wastes effort.
- Worth starting indoors: Tomatoes, peppers, eggplant, celery, onions, leeks, basil, and slow-growing flowers like snapdragons and petunias.
- Fine either way: Zinnias, lettuce, broccoli, cabbage, and kale - all transplant well but also direct sow reliably once soil temperature is right.
- Direct sow only: Carrots, beets, radishes, peas, beans, squash, cucumbers, and sunflowers. These either produce taproots that hate disturbance or grow so fast that the indoor start offers no real advantage.
For flowers, starting fast-finishing zinnias indoors just 4 weeks before last frost gives earlier blooms without the leggy-seedling risk of starting too early. Flowers with long development times - like lobelia and snapdragons - earn the full 10-week indoor start.
Herbs are a strong indoor-start category across the board. If you want year-round herb harvests, starting from seed indoors and keeping a few pots under lights works through winter without a dedicated garden space.
If you're building out your full planting calendar, February planting decisions often include the first indoor pepper and onion starts of the year - crops that need the longest runway before last frost.
Sunflowers look like an obvious candidate for early indoor starting, but they grow so fast that transplanting is rarely worth it. Sowing sunflower seed directly in warm soil gives comparable bloom timing without the root disturbance risk. If you want earlier sunflower blooms than neighbors, improve your soil instead of starting indoors.
The full range of garden plants includes many species that start beautifully from indoor seed - once you've mastered the basics with tomatoes and herbs, expanding to perennials and unusual annuals becomes straightforward.
For gardeners focused on full-sun beds, most heat-loving sun plants like peppers, eggplant, and basil are exactly the crops that reward a long indoor start in cold climates.
Frequently Asked Questions
Most vegetables need 6-10 weeks, but peppers require 10-12 weeks due to slow germination, while fast crops like zinnias and basil only need 4-6 weeks before your last frost date.
A fine-textured, soilless blend of peat or coco coir with perlite works best — tomatoes need consistent moisture and good drainage, and any mix containing actual soil compacts too easily in small cells.
A south-facing window in winter typically delivers only 4-6 hours of usable light, which causes leggy stems in tomatoes and peppers — LED full spectrum lights running 14-16 hours daily give far more reliable results.
Damping-off is a fungal disease triggered by wet soil surfaces and poor airflow — switching to bottom watering and running a small fan near seedlings for 1-2 hours daily eliminates most cases within days.
Yes, but sanitize them first by soaking in a solution of 1 part bleach to 9 parts water for 10 minutes — this kills fungal spores left from previous seasons that would otherwise cause damping-off in new seedlings.
Pin it for your next how to start seeds indoors step by step project.