A fresh layer of mulch does more than make a garden bed look tidy - it cuts your watering frequency, smothers weed seeds before they sprout, and insulates roots against temperature swings. Most gardeners underestimate how much mulch depth and placement matter.
Too thin, and weeds push right through. Too thick against a trunk, and you've created the perfect conditions for rot and rodent damage.
Getting it right takes about 30-45 minutes for an average 100-200 sq ft bed. The process is straightforward once you know the rules around depth, clearance, and material choice.
According to UC ANR mulch guidance, mulch delivers weed suppression, moisture retention, and soil protection - but only when kept 3-12 inches away from plant stems and tree bases. That single spacing rule prevents more problems than any other step in the process.
We'll also look at how mulching decisions shift depending on whether you're dealing with a vegetable bed, a perennial border, or a newly planted tree. Context changes the right answer for depth and timing.
Mulching garden beds properly means choosing the right organic or inorganic material, applying it at the correct depth (2–4 inches), keeping it clear of stems and trunks, and refreshing it annually. Done right, mulch cuts watering needs and suppresses most weed growth.
Mulch is not a permanent fix — it breaks down over time, which is actually beneficial for soil health. Plan to top it off each spring, and check depth again in late summer if you're in a high-rainfall region.
Mulch in 6 Clear Steps
Each step below builds directly on the last. Skipping or rushing any one of them is where most mulching problems start - especially with stem clearance and depth.
Remember it later
Planning to try this recipe soon? Save it for a quick find later!
Step 1: Assess Your Bed Before You Buy Anything
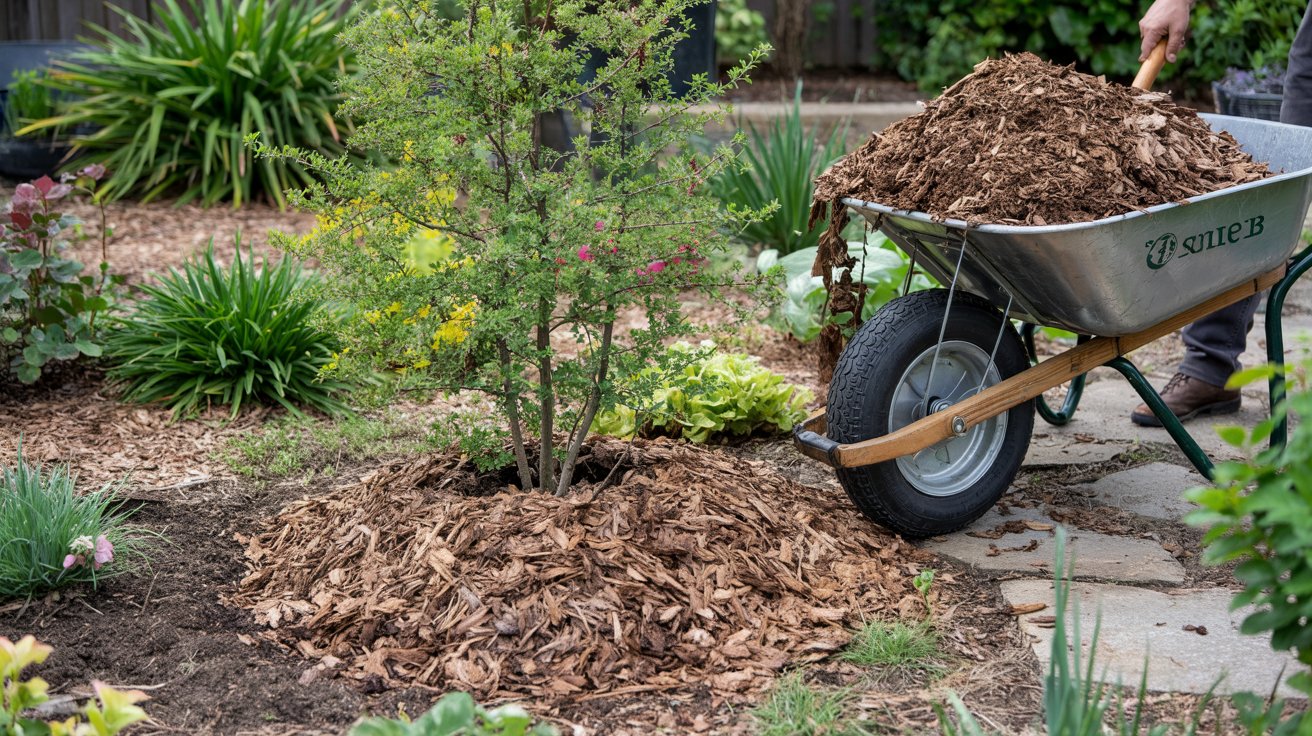
One detail that often gets skipped: if you're using wood chip mulch near newly planted trees, keep the first 6-12 inches around the trunk completely clear. Young bark is especially vulnerable to moisture buildup from mulch contact.
For beds alongside screening shrubs and hedges, a wider mulch ring - up to 3 feet in diameter per plant - helps suppress grass competition and conserves water during establishment. This is especially useful in the first two growing seasons.
If your bed includes drip irrigation, lay lines before mulching and mark emitter positions. Burying emitters under thick mulch leads to uneven watering and can mask clogs.
Leave a small gap in the mulch directly over each emitter so you can inspect them without disturbing the whole bed.
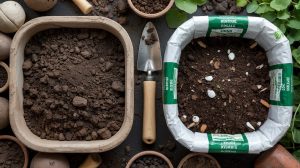
Buy mulch by the cubic yard for beds larger than 100 sq ft — it's cheaper and reduces packaging waste. One cubic yard covers roughly 100 sq ft at 3 inches deep. Calculate depth times area before ordering so you don't run short.
Mulch Materials, Timing, and Placement
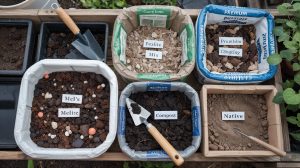
Not every mulch works equally well in every bed. Material choice affects how fast the mulch breaks down, how much water it holds, and whether it introduces weed seeds or pests into the bed.
Understanding those trade-offs helps you pick efficiently and avoid regret mid-season.
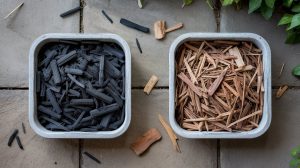
Organic mulches - shredded bark, wood chips, straw, pine needles, and compost - decompose over months to years and steadily improve soil biology and structure.
Inorganic options like gravel, crushed stone, or rubber chips don't break down, so they're lower maintenance but do nothing for soil health.
Timing matters as much as material. For vegetable and annual beds, apply mulch after the soil has warmed in spring - mulching cold, wet soil traps that cold and delays root growth.
For perennial beds and shrub borders, early spring mulching conserves moisture before summer heat sets in. For trees, fall mulching protects roots from freeze-thaw cycles in colder zones.
The Penn State Extension recommends a 2- to 4-inch organic mulch layer around landscape trees, kept clear of the trunk. UNH Extension's garden mulch guide adds that mulch should stay 2-3 inches away from plant bases to prevent disease and reduce rodent nesting near crowns.
| Bed Type | Best Material | Depth | Stem/Trunk Clearance |
|---|---|---|---|
| Vegetable beds | Straw, compost | 2–3 inches | 2–3 inches from stems |
| Annual flower beds | Shredded bark, compost | 2–3 inches | 3 inches from stems |
| Perennial borders | Shredded leaves, wood chips | 3–4 inches | 3–4 inches from crowns |
| Shrub borders | Wood chips, pine bark | 3–4 inches | 6 inches from base |
| Landscape trees | Wood chips, shredded bark | 2–4 inches | 6–12 inches from trunk |
| Rock/dry gardens | Gravel, crushed stone | 2–3 inches | 3 inches from stems |
If you're still weighing whether mulch or rock makes more sense for a low-maintenance border, a direct mulch vs. rock comparison can help clarify the long-term trade-offs.
For wood-based options specifically, there are real differences between hardwood and softwood - a hardwood vs. softwood breakdown covers which decomposes faster and which holds color longer.
Common Mistakes and Quick Fixes
Most mulching problems come from two habits: applying too much and placing it too close to plant bases. Both are easy to fix once you know what to look for.
The "mulch volcano" - a thick cone of mulch piled directly against a tree trunk - is the most common and damaging error in home gardens. According to CSU Extension and UC ANR, this practice traps moisture against bark, promotes fungal rot, and creates habitat for rodents and insects that chew through bark.
Pull mulch back immediately if you spot this.
- Keep a clear ring of bare soil 3-12 inches around all plant stems and tree trunks.
- Apply 2-4 inches of mulch in a flat, even layer - use a rake to level after spreading.
- Pull weeds first so you're not locking established weeds under a protective cover.
- Top off annually in spring when depth has dropped below 2 inches.
- Use a weed barrier under mulch only for paths and hardscapes - see our guide on weed barrier vs. mulch for planted beds.
- Don't pile mulch against trunks - it causes bark rot, disease entry, and rodent damage.
- Don't exceed 4 inches - deep layers reduce oxygen and water penetration to roots.
- Don't mulch wet or cold soil in spring - wait until soil has warmed above 50°F in vegetable beds.
- Don't use fresh wood chips directly in vegetable beds - they tie up nitrogen as they break down.
- Don't skip watering after applying mulch - the layer needs moisture beneath it to function properly.
One less obvious mistake: using the same mulch depth across every bed type. A 4-inch layer that works well under a shrub border can suffocate shallow-rooted annuals.
Match depth to plant type using the table in the previous section rather than applying a single depth everywhere.
Mulch should touch soil, not stems. No exceptions for any plant type — not tomatoes, not roses, not mature oaks. The damage from mulch-to-stem contact accumulates slowly and often isn't visible until it's already caused rot or girdling.
Frequently Asked Questions
Iowa State Extension recommends 2–4 inches in vegetable beds, with finer materials like straw applied at the shallower end to avoid blocking water penetration to shallow roots.
Yes — mulch piled against the trunk traps moisture and encourages fungal rot at the bark. Keep mulch at least 6–12 inches clear of any tree trunk to prevent this.
Most organic mulch needs topping off once a year in spring. Vegetable beds may need a second application mid-season because tillage and soil disturbance accelerate breakdown.
Fall mulching around perennials and tree roots is safe and beneficial — it insulates soil against freeze-thaw damage. Wait until after the ground has cooled to avoid trapping warmth that delays dormancy.
Wood-based mulch can harbor moisture-seeking insects if piled against a house foundation or plant stems. Keep mulch at least 6 inches from structures and maintain proper stem clearance to reduce pest risk. You can also review raised bed soil options that combine mulch with better drainage for pest-prone areas.
Pin it for your next how to mulch garden beds properly project.